Tuesday, January 26, 2016
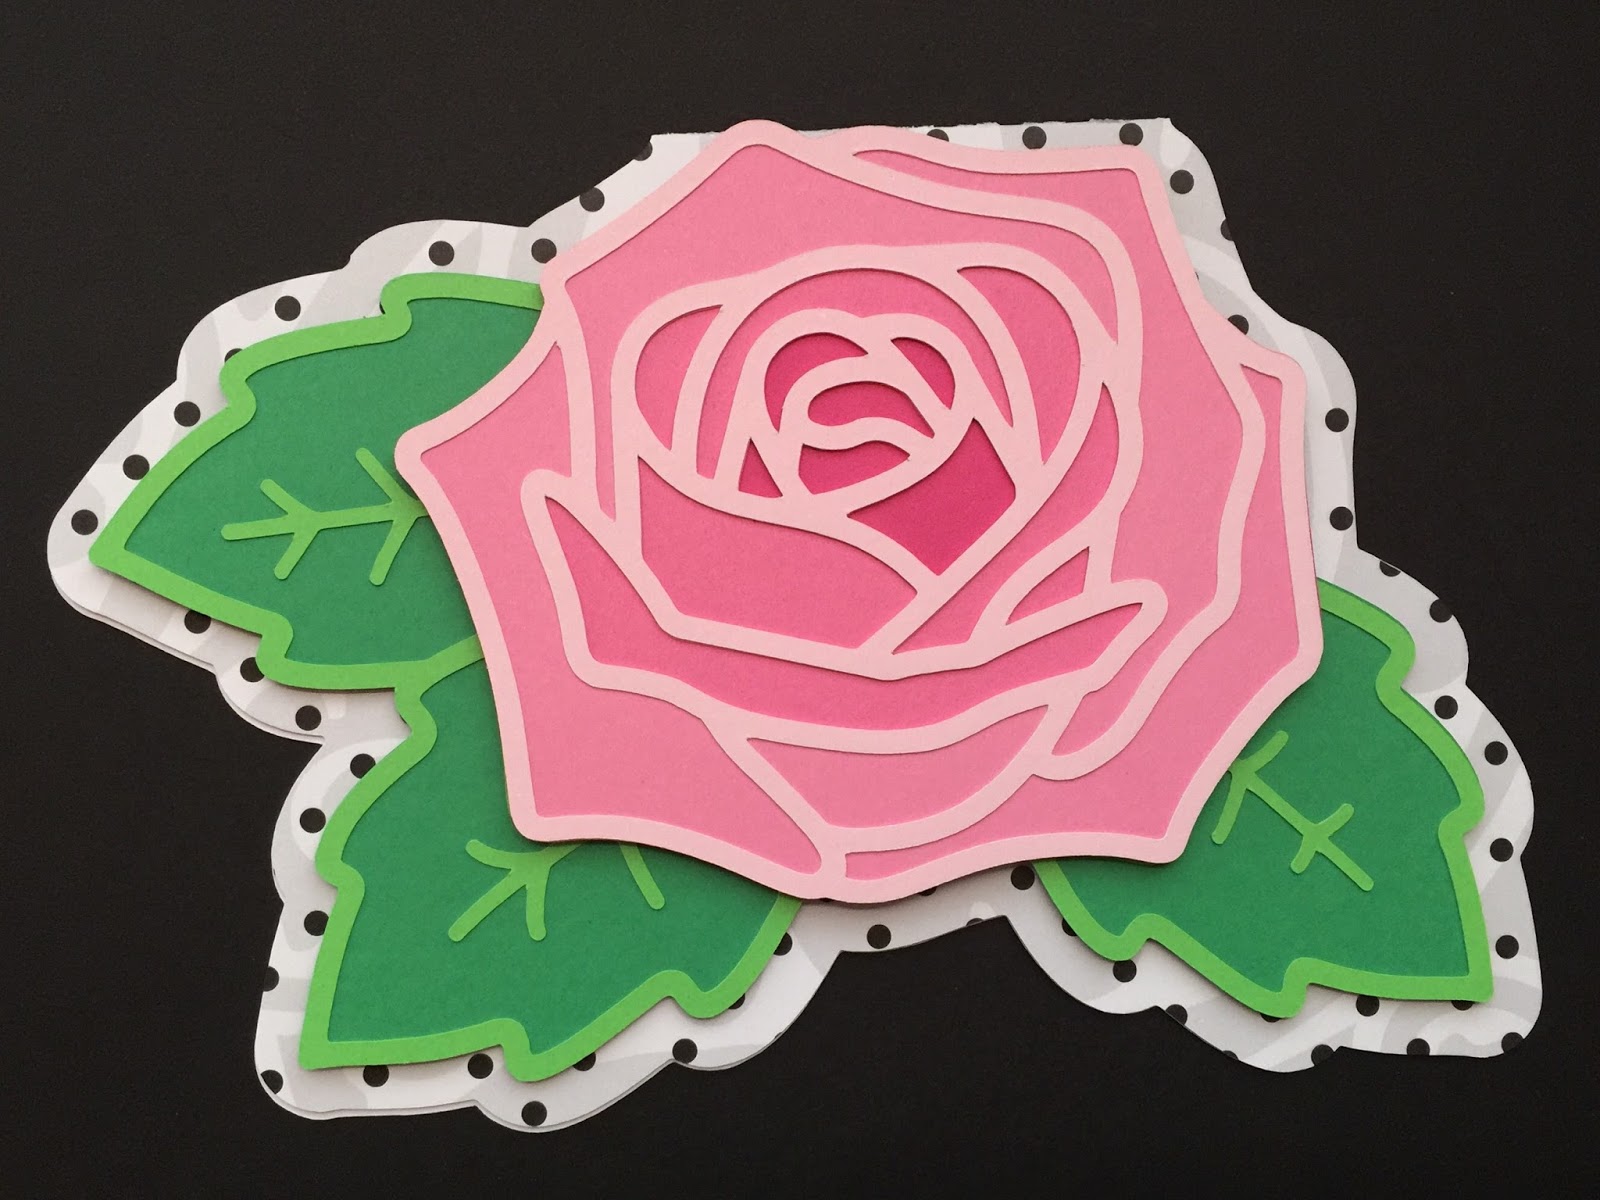
Roses are Pink Card
I just love this new Roses are Pink design from BirdsCards. As is typical with one of Bird's designs, this was very easy to cut out and put together and has such a lovely end result! I was inspired by her use of a black and white pattern for the base card and think the other colors really pop. I'm thinking I might have to try it in red, yellow, lavender, etc.
Not sure if I'll use this for an upcoming birthday card or maybe a Valentine's greeting. I think this would also be gorgeous done as a wedding card in white pearl papers. So many choices!
Bird also posted a new FREE Retro Rose Heart Card which is so pretty. I'll have to make that one next.
Thanks for stopping by!
Wednesday, January 20, 2016
Lovebug!
As part of my 2015 SVGCuts Spring Challenge entry, I made this ladybug out of the owl from the Enchanted Autumn kit by SVGCuts. I'm a big fan of ladybugs and just HAD to have a 3D paper version for myself.
Ultimately I just modified some of the panels on the head and body to eliminate the 'feather' cutouts and add some dots to my bug. Had I been really ambitious, I might have added wings, but I was really pressed for time!
I think she's the perfect addition to my Valentine's decor as a little lovebug. It would be cute to create this using hearts instead of dots on the wings too. So many possibilities!
Thanks for stopping by!
Ladybug Love Shack and Love Lantern
Last year I created this little ladybug love shack using the Hugs & Kisses kit from SVGCuts. I'm a lover of all things ladybug, so the cute little fox was replaced with Ms. Bug which I cut from the Cricut Create A Critter cartridge. I had fun picking out all the polka dotted papers and bling for this project. Now that I've got it out for display again this year, I might see if I can add some hearts puffing up out of the chimney. As if there's not already enough glitter and bling!!!
I also had fun altering the Damask Lantern from the Mistletoe Manor kit, also by SVGCuts. I kept some of the damask pattern, but moved it around to fit in some of the swirly hearts from the For My Valentine kit. I just love how this came out. I always look at things down the road and want to add more. I think this needs a glittery ribbon bow and/or maybe some flowers on top. Adding it to my To Do list!
It's so much fun to decorate for Valentine's Day!
Thanks for stopping by!
Saturday, December 26, 2015
3D Christmas Village
Here's a quick peak at the growing Christmas village I've been building using many different SVGCuts.com kits. I built some of these last year and just got around to embellishing them this year. Others were built over the past few months and are still works in progress. Most of them sit on a black bookshelf, so the photos aren't the greatest.
I have so much fun picking out the papers and thinking of ways to make these unique. And the more I look at the same kits done by others, I get even more wonderful ideas and inspiration.
I hope you enjoy this photo gallery of Christmas Cove, a coastal village of my own imagination which is a very merry place to live!
I added some icicles to "Flurry Chapel," aka the Silent Night church.
Got bling? I went a little crazy adding sparkle and shine to this gingerbread house from the Happy Holidays kit.
This is the 3D Snowy House from the Winter's Chill kit. I added a 1" miniaturized wreath from the Silent Night kit. Thank goodness for fork bows, because there was no other way I would have been able to tie one that small! I also added some coach lights from the Enchanted Autumn Pumpkin Carriage.
I used one of the snowflakes from the Winter Gazebo kit and fashioned a weathervane of sorts to go on top of the gazebo. The pine garland is Pine Twine from Tim Holtz. I keep meaning to add some shadow figures to this so they show through when it's lit up. Maybe next year!
This is Maple Manor all decked out for Christmas. I added a widow's walk to the top as I grew up in New England and remember seeing so many beautiful historic homes along the coast with them on the roof. I added some sidelights around the front door and made a wreath from Tim Holtz Boxwood twine and jingle brads. I never got around to adding a fence and some other details to this project, so I guess I'll be decking this one out next year as well.
Last but certainly not least, here's Candy Cane light (from the Seaside kit) along with the Christmas Tree from Santa's Surprises. So much more I want to do to further embellish these too, all I need is time!
Thanks for joining me on this short tour through Christmas Cove. Happy Holidays!
Piano Box Card
I decided to add a few Christmas touches to the SVGCuts.com Piano Box Card from the Summer Box Cards kit.
Instead of using the flowers that came in the kit, I miniaturized some poinsettias from the wreath in the Santa's Surprises kit which is also from SVGCuts.
I even found a teeny tiny snippet of Silent Night sheet music in my Tim Holtz stash that I added. Love it! I'm so pleased with how this turned out.
Thanks for stopping by!
Labels:
box card,
Christmas,
piano,
poinsettia,
svgcuts
Disney Explosion Box
At the request of a good friend, I set out to create a spectacular Disney-themed explosion box for her to use when gifting some theme park passes this Christmas.
I neglected to take pictures of a lot of things along the way, and these are by no means detailed instructions, but here' the basic gist of it:
I started out my box using the SVGCuts.com Small Snowflake Box from the Winter Gazebo kit. To turn it into an explosion box, I cut the pieces called 'bottom sides' into 6 panels. I left the tabs at the bottom for gluing, but the panel on the right has a side tab that is not needed, so I cut it off as well. When all was done, I had six panels that looked like this:
Next I cut out the pieces called 'bottom' - two hexagons - and set about gluing my 6 panels to the largest bottom piece, one on each of the six sides.. I used the leftover hexagon bottom to cover up the glued tabs and finish it off neatly.
I used my Cricut Disney cartridge to cut out the various characters and decorated the panels with an embossed background, the characters and some bling to weight down the flaps. Mickey and Minnie are mounted on some acetate strips, so they move around and look like they're really jumping for joy! The flap with Mickey's hand is a pull-out pocket where I added a message about going to Disney.
I added a sliceform tree that I found a pattern for online. It required a lot of tweaking, but I got it to work out for me. I stuck it on a doily 'tree skirt' with some hot glue and added some mini presents to finish off the inside.
For the exterior, I created some decorative panels in red to go around the outside panels and added white ovals to the two front panels to look like Mickey's pants buttons.
I made the plain box lid (in the extras folder) and decorated it with some festive greenery (from a Cricut cartridge) on the outside and then hid a little surprise for one of the recipients (also a Star Wars fan) on the inside of the lid.
The idea for the Mickey ears came from Sharalyn Morgan's blog post called Minnie Ears for Crystal.
I used the SVGCuts.com Baseball Cap file from the Fun and Games kit to get this started. I made my ears slightly different than Sharalyns in that I omitted the bow, put the ears in different placement due to how I wanted the box to face, and then I glittered the ears themselves and then sealed them with some Mod Podge so the glitter wouldn't get all over EVERYTHING!
Once the ears were all put together, I glued the baseball cap top (with ears) to the baseball cap base with some hot glue around the inside of the box. The ears are what is going to be used to open the explosion box, so I needed it to stay together.
After the baseball cap/ears box was one glued unit, I then glued that to the top of the snowflake box lid:
to get this:
I'm told this project was a huge hit Christmas morning and I'm so very glad. It was a fun challenge to create this and come up with different ideas for how to make it special.
Thanks for stopping by!
Saturday, October 31, 2015
Nativity Paperscape Card
I think the paperscape cards from Dreaming Tree are just so cool! This Nativity card is from the Christmas Paperscape Cards collection. As mentioned here previously, I just love projects that I can light up, so this is right up my alley.
I frequently leave my cards unfinished (as I've done here) so that I can personalize them down the road when I decide who the recipient will be. I will likely add a foil message in the top section using my Minc machine, but I haven't made up my mind what I want to say yet.
I'm primarily posting this now because of the happy accident I discovered when gluing it all together. I used some starry looking paper from an old DCWV Christmas paper stack to cut out the background piece. It has the lyrics to "We Three Kings of Orient Are" printed in swirls all over the paper. I just stuck the 12x12" paper to my Cricut mat and hit go.
Check out where the "O Star of wonder..." lyric shows up on the paper. The star placement couldn't be more perfect if I had planned it that way. In fact, if I had tried to place the star where it landed, this probably would never have happened!! #fuzzymathskills
I guess I was meant to use this paper for this particular project. Couldn't be happier with the result.
Thanks for stopping by!
#xmaspaperscape3dsvg
Winter Village Box Card
It seems funny to say "Happy Halloween" when I'm here to show off some Christmas projects, but that's just the way it goes sometimes when it comes to seasonal crafting!
I just love Mary's new release of the More Christmas Box Cards kit at svgcuts.com. This Winter Village Box Card is one of my favorites in the kit (although I truly love them all) and so I thought I'd give it a go.
Katarina Ewa posted a picture of her version the other day where she altered the kit ever so slightly to create a vellum window in the front and put a small battery tea light inside. I'm a sucker for anything that lights up and glows, so I had to try it too. I love the result! Thanks for the great idea Katarina!
Of course once I did that my wheels were turning and I had the idea to turn this card into a faux snow globe shaker card. I just recently picked up a Fuse tool at the craft store (using a 60% off coupon - what a deal!) and used it to create a round shaker pocket with some coordinating glitter, sequins and microbeads in it.
At first I tried it without a background paper, but I could see the bottom of the other layers through the window, so I just stamped the bottom of the front fence layer with some snowflakes and glued it in to provide a background for the shaker pocket. Love it!
This was a really fun project to create and was really simple to cut out and assemble. Now I have to decide which one I'll take on next - I think it might be the Front Door card.
Have a great day. Thanks for stopping by!
Friday, October 9, 2015
Black Cat Burlap Block
I just love the Black Cat Gift Bag that Mary designed for the Barn Party kit from svgcuts.com, but I didn't really have a need for a bag, so I decided to make this as a decoration instead. I have some 5.5" burlap panels in my stash and re-sized the pieces to fit.
I was also happy to be able to use this orange pom pom fringe that I've had for a few years now. I think I need to fluff some of them up, I just noticed that a few are looking a little flat in the photo!
I added some purple bling stickers to the corners, some green Stickles along the bottom edge of the pleated collar and some Halloween washi tape around the outside edges. He's going to look so cute on my bookshelf! I love how this came out.
Thanks for stopping by!
Spider Venom Bottle Label
When I purchased the Spider Venom Party Pack from birdscards.com I saw this fun bottle label which can be added to a wine bottle for some spooky goodness.
I immediately thought of a fun square bottle I have saved for the purposes of making some potion bottles and I knew that this would look great on it! I re-sized it a bit so it would fit my bottle - the label pictured here is only about 2.5" wide!
I also had to the idea to cut the 'venom' letters out of Heidi Swapp toner paper and run this through my Minc to add some shiny, purple-foiled goodness. It's not the easiest to photograph, but hopefully you can see the gleam in the picture below. This angle also shows off the facets on the spider body (gem stickers) better too.
I think I'm going to fill the bottle with some bright green glittery liquid and once that's done and sealed, I'll stick my label on. I don't want to risk splashing it the bottle filling stage.
Thanks for stopping by!
Subscribe to:
Posts (Atom)


