Showing posts with label dreaming tree. Show all posts

Thursday, August 2, 2018

Halloween Countdown Calendar


Let me start by saying that this was a very difficult project to photograph - it's just shy of two feet tall! When I put all of the lights on inside of it, it gets very bright in here too. I've tried to take some pictures of each section to show you a little of what I did, but it's definitely not a full blown tutorial. 

This Halloween Countdown Calendar was my entry into Dreaming Tree's Summer Challenge. If you follow the link, you can see lots of amazing examples of beautiful 3-D papercrafting.  The challenge was to combine files from two or more Dreaming Tree projects to make a unique, custom project.

Here's a picture of the whole thing, all lit up:


I used elements from seven different Dreaming Bundles to create this colorfully spooky countdown. Working from the top down, I used the bat from the top of the Vintage Halloween Screen in  Lily's Halloween Decor bundle as the crowning element to an upside down Tick Tock Clock from the Making Time bundle.  


I used a Cricut spiderweb for the face of the calendar as I needed a web with 12 points on it since I was adding all 12 months.  The months were cutout in vinyl using a free font called Burton's Nightmare from dafont.com.  The 31 is from the same font.  The rosette in the center of the spiderweb came from the Compass Gift Box in the Good For Guys bundle.

The clockhand is from the Tim Holtz Idea-ology line - I coated it with orange Stickles to give it that wonderfully sparkly finish.  The skull and crossbones pieces are also by Tim Holtz.


The center section was actually really fun to create, but the photos didn't do a great job of showing it.  There's a new Heidi Swapp product available at select Joann's stores which is called Neon Glow. It's an 8 foot coil of battery-operated, vibrant neon wire. I used the lemon lime color to make a neon frame for my glittery ghost.  Here's what the neon looks like when you turn it on. There are two blink settings too!  


I took a video clip of the neon while I was building the project because it was so much fun to play with: 


Here's another picture of my ghostly ghoul while I was working on the middle section. The ghost is from the Shudder Shutter card from the Holiday Hauntings bundle and I have him suspended in an elongated Halloween Cookie Box which was a freebie from Dreaming Tree.  I modified the cookie box to get it to fit into the project. The idea was to make it look sort of like a pendulum in a grandfather clock.  


The bottom section is the same Tick Tock Clock as used in the top section, only this time it's right side up.  I used the frame from the front of the Lucky 7's Slot Machine in the Vegas Road Trip bundle to create the countdown window.

The word Halloween came from the Candy Dish in the Frank and Friends bundle and the 'Days To' is the Burton's Nightmare font again.  The mirrored stars from Tim Holtz were tinted with bright green alcohol ink and added to the front for some extra sparkle and interest.  

I think that about covers it from top to bottom. I've included a few more extra photos below. I really enjoyed challenging myself to create this crazy project and now I have a fun Halloween decorative piece I can use for years to come.  


We're 91 days from Halloween as of today, so there's plenty of time to create some more spooky projects.  Thanks for stopping by!

Wednesday, November 1, 2017

The Beauty of Fall Colors


I think this new project has made it to my top five favorites of all time!  I grew up in New England where colorful fall foliage is a treat for the eyes this time of year. Combining those wonderful autumn colors with some copper foil and lights just makes me happy.  


This was a bit of a hybrid project as I used svg files from three different sources to create this lovely shadowbox:

1.  Large Square Shadowbox Frame from Bird's SVGs Picture Perfect Collection
2.  Falling Leaves Paper Sculpture from Dreaming Tree's Autumn Calling Bundle
3.  The Beauty of Fall Colors, a free download from Love SVG

I created the white shadowbox frame using the size it was designed to be - 11" square. I did not use the acetate on the front to close up the shadowbox, but you certainly could. I love being able to make my own shadowbox frame whenever I want. It's easy to customize and Bird designed it in a way that's very easy to put together.

I sized the Falling Leaves border to be 8.8" wide so it would fit inside of my frame. The leaves were all sized down at the same time.  Some of these leaves were cut from patterned paper, some were run through my Cuttlebug with an embossing folder and some were just inked using Tim Holtz Distress Inks.  I cut one extra layer of the border to use for lighting - I'll explain below.


The "Beauty" phrase was sized to 4.135" wide and cut from Cricut copper adhesive foil and transferred to the blue background layer. I also used a copper foil patterned cardstock for the front panel of the shadowbox frame, although it's hard to photograph the fantastic shine of it.  Here's a closeup where you can see it better:


Last but not least, I added a 5-foot long string of LED lights (I purchased these on Amazon) and sandwiched them between the layers of the leaf border. Because the lights are on a flexible wire strand, I bent them and taped them down near the tips of all of the leaves.  I added foam dots all over the top of that layer and added the finished leaf layer on top of it.  The sandwich from bottom to top goes like this:

1.  blue bottom layer

2.  double thick red border layer attached to blue layer with foam dots/tape for dimension
3.  light strand taped down to top of layer 2
4.  red border layer with decorative leaves attached over layer 2/lights using foam dots/tape

Prior to the layering, I decided where I wanted to mount the battery pack on the back of the frame and then punched a hole through the frame as well as layers 1 & 2 so I could thread my lights in though the back.  I wish I had taken a few pictures when working on it, but didn't think of it until after everything was already stuck down.  


If I've missed a step or you'd like a more detailed explanation, let me know and I'll try to help. It's really not hard, just a little time consuming. I think the end result is well worth it though!


Thanks for stopping by to check it out!  I'd love to hear what you think.  

Thursday, September 21, 2017

Party in a box!


We have a family member who is coming up on her 100th birthday in the next few months and I knew I needed to make a very special 'card' to celebrate this momentous occasion. The Explosion Box from the It's Your Birthday bundle by Dreaming Tree immediately came to mind.  

I started with the recipient's favorite color, bright red, and began by building the outer panels of the box with it's white glittery ribbon. It looks so festive! 

Next, I had an absolute blast decorating each panel on the inside - I'll take you through each one. I used svg files from a few different places as well as some die cuts, but the majority of the project is the file from Dreaming Tree.


First are my favorites of the whole project - the sequin filled shaker balloons!  I modified the balloon file in Cricut Design Space to create a cutout in the middle of the balloon. I cut out five layers for each balloon and glued them together to create the pocket for the sequins. 


The addition of so many sequins to each of these panels definitely weighs down the flaps, but I just love them so much! I used white vinyl on the front of the acetate to add the "100!" to each balloon.

On the triangular inner flaps, I started by adding this cute little party monkey from Cricut. The recipient loves monkeys, so this was a definite must have. I embellished with some more sequins and tiny confetti which was cut out using the Cuttlebug Celebration Confetti die. 


I added a cute little girl party bear too, also from Cricut, and dyed her tiny hat pompom to match with some Tim Holtz Twisted Citron re-inker. 


Next up, I added a party hat which looks just like the big one in the center of the box:


I wanted to have a Happy Birthday message of some sort, and found the perfect thing in a free pennant file from Bird's SVGs.  I sized the pennant to fit the flap and blinged it out with some gems across the top.


Last but not least, I also wanted to have a place to sign the card and add a sentiment. I used a cupcake card from Cricut's  Sweet Treats cartridge which I sized down to fit. I stamped a sentiment inside the card, signed it and attached it to the flap.  


Here's the final version one more time:


I'm really so pleased with how this all came together. The colors and shaker elements make this feel like a party in a box to me. Now I just have to wait a month or so before I give it to the recipient - can't wait!  I think she's going to love it too.

Thanks for stopping by! 

Tuesday, January 17, 2017

Love Bug Box


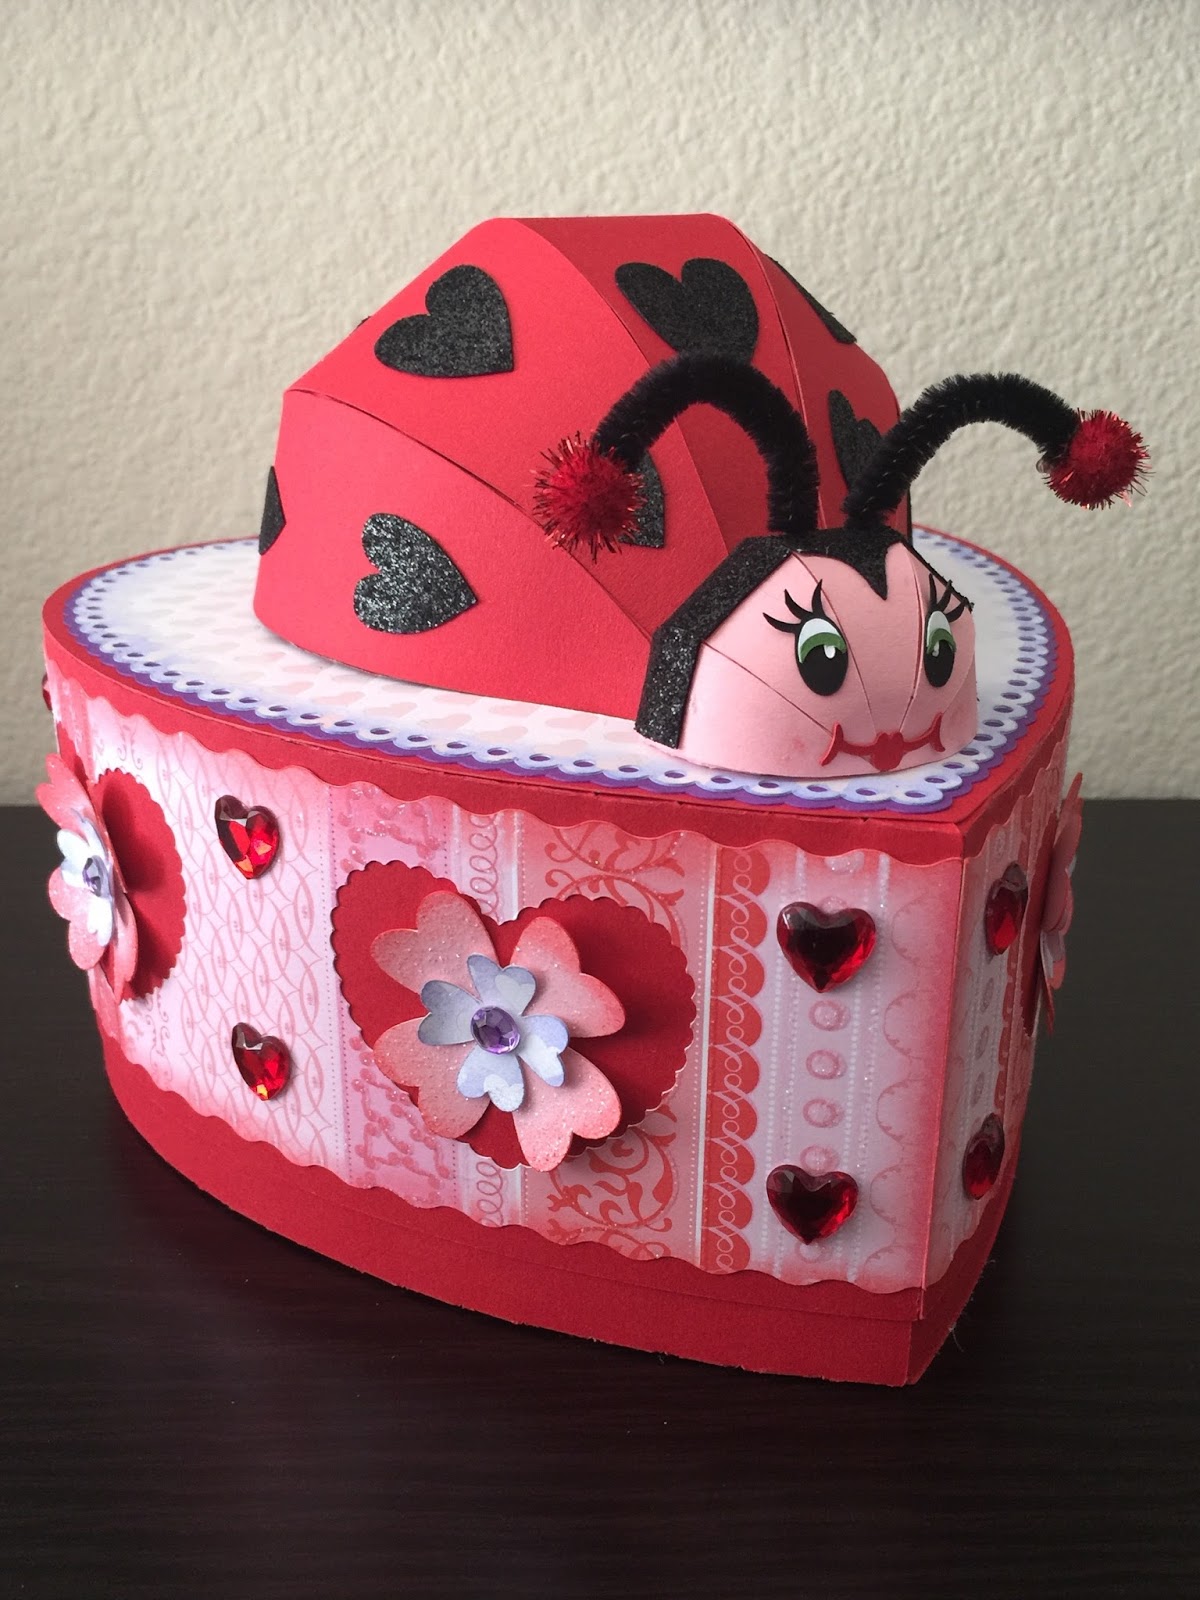
From the moment I saw the 'coming soon' post on Instagram for this ladybug box, I was in love! Ladybugs hold a special place in my heart and as a result, I have a small but unique collection of ladybug treasures that I've accumulated over the past 25 years. Because of this, I was understandably excited to see two of my favorite things, ladybugs and paper, come together in this adorable 3D box from Dreaming Tree's Love You More bundle.


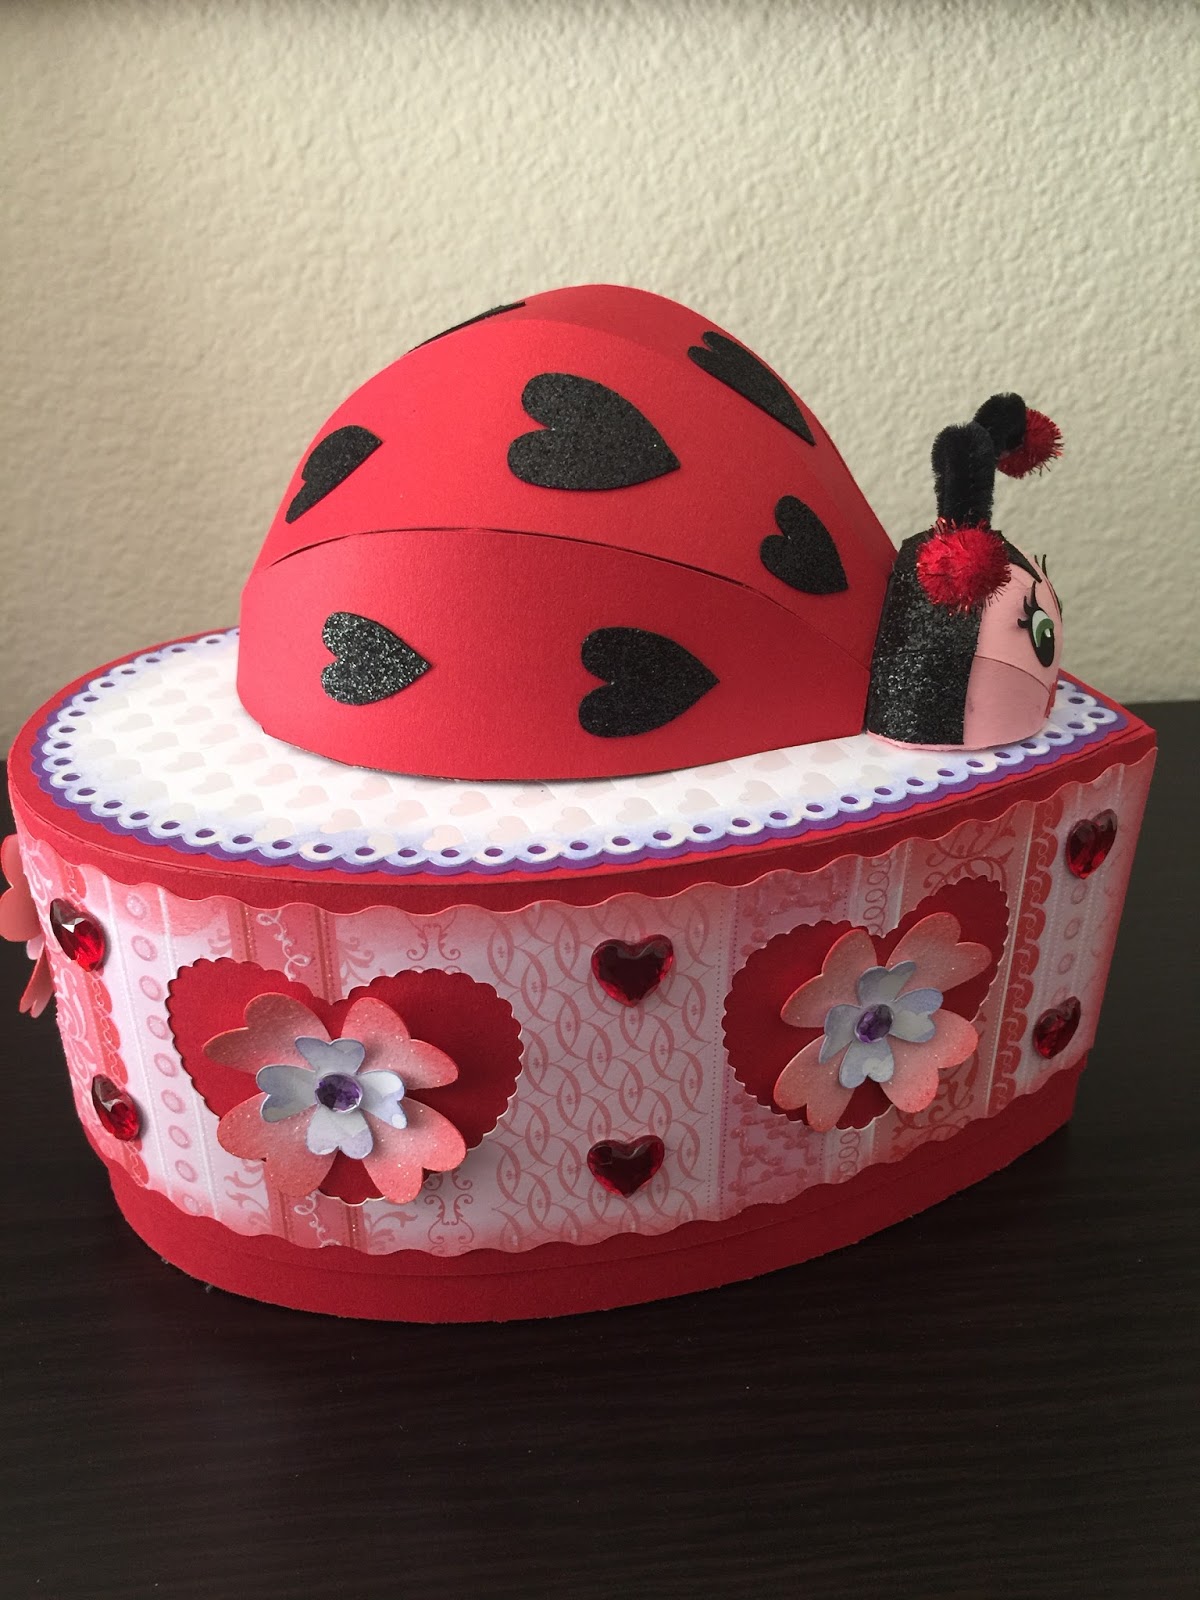
I have no intention of using this box as a mailbox or bank, so I hid the contours for the mail slot when I was laying this out in Cricut Design Space prior to cutting. You can see above that I added some hearts to the back center panel of the ladybug's body where the slot would have been. I also changed the direction in which the hearts point.


This side view shows how I redistributed the hearts on the ladybug body as well as some of the flower embellishments. 

I cut  the larger flower out of light pink glitter paper and inked the edges with some abandoned coral Distress ink. The smaller flowers were cut from the same pearl paper I used on the top of the box which is pearl heart print which I also inked with Distress, this time in shaded lilac.  


I liked how the purple gems in the original project tied the colors all together, but I didn't have any purple gems. Alcohol ink to the rescue! I simply dabbed some Purple Twilight alcohol ink from Ranger onto some clear gems and behold...purple gems! I use this little trick a lot to create gems, pearls and other embellishments that match my project color scheme.


The pipe cleaners I have are so thick and fuzzy that when I tried to loop them, they looked large and rather silly, so I kept them short and hot glued some glittery red pom poms to the ends.  


I love how this project came together and am so thrilled to finally have a 3D paper ladybug! I think I'll be making more of these in the future.  

Thanks for stopping by!  

Tuesday, June 28, 2016

Rocket Lantern

...and the rocket's red glare....
  

Okay, well maybe more than just red glare! I only made one rocket (so far), but I was having a good time taking pictures of it every time the tealight changed color, so figured I'd just share all of the colorful pics. 

Here's a closer look at my Rocket Lantern from Dreaming Tree's Stars and Stripes Forever bundle. It's just one of three illuminating projects just in time for the 4th of July. 


I didn't really do anything to change this one very much from the original by Dreaming Tree...why mess with perfection?  I did use silver glitter paper for the nose cone and base, but other than that, I kept it pretty simple.  

This could be so cute for New Year's Eve too, don't you think?  Maybe done in black, silver and gold instead?  The sky's the limit (pun intended).  

Thanks for stopping by! 
Thursday, June 23, 2016

Sunflower-ish Tealight


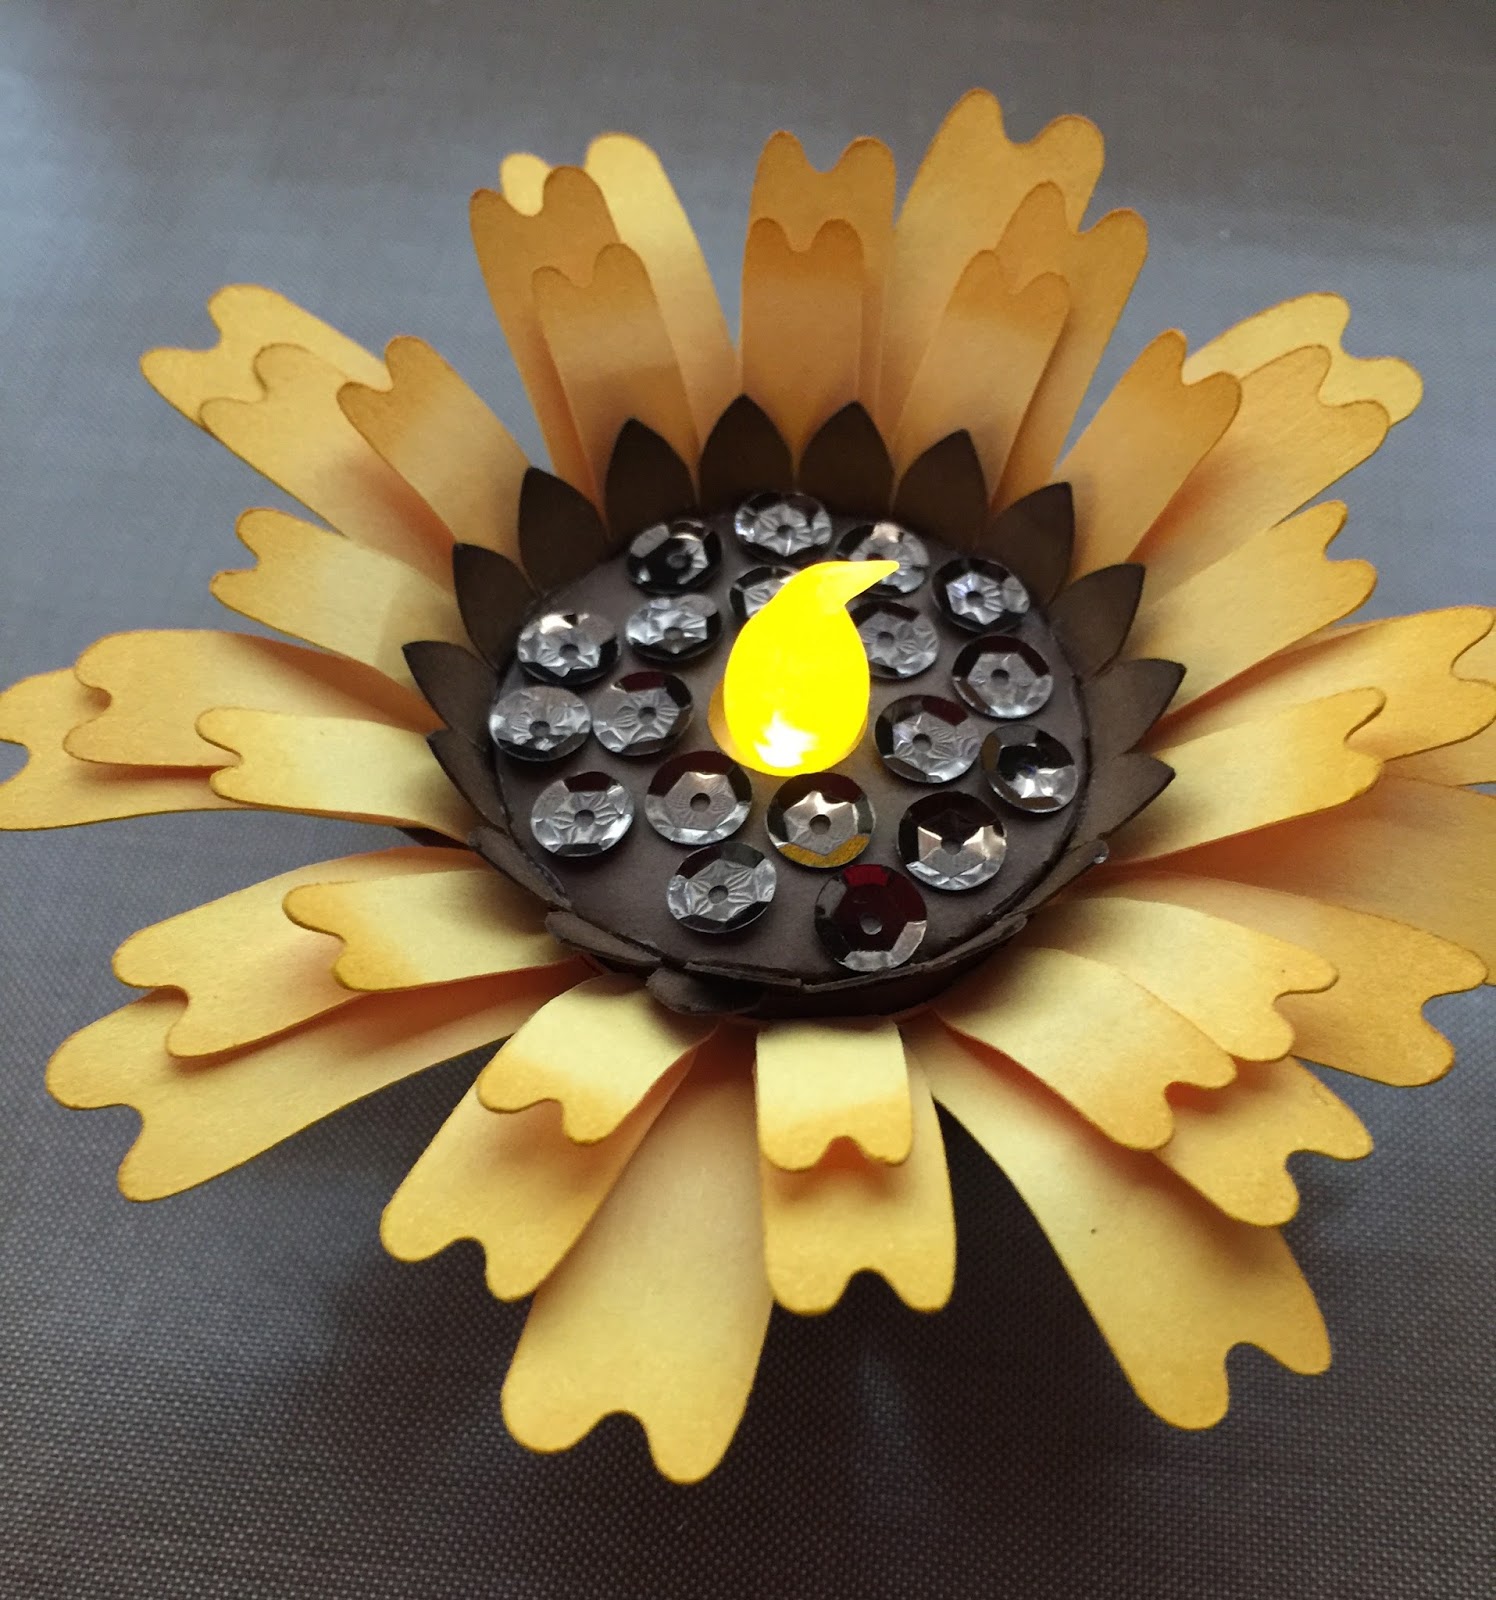
Just a really quick post to show you what I did with the free Gerbera Daisy Tea Light from Dreaming Tree.  

For some reason I was thinking of how cool these would look in some fall colors, and decided to make this into a sunflower of sorts.  Or maybe a black-eyed susan?  Either way, the sequins in the center reflect the tealight flame a bit and make this extra sparkly which always makes me happy. I think a glittered center would be cool too.  

Thanks for stopping by!

Tuesday, June 21, 2016

Fire & Dragonfly Lantern

It's a bit of an overcast day today, so I thought I'd light up my lanterns for their moment in the front of the camera!


Both of these are from the new Summer Nights and Flights bundle by Dreaming Tree. I actually had the same Violet Leaf stack of DCWV paper and so I made my first lantern (the one on the right) to look almost exactly like the one that Dreaming Tree shows on their website. 

I made a second lantern for a neighbor who just returned from a few months in China and who brought me back the gift of a beautiful silk scarf. To me this lantern has somewhat of a pagoda feel, so I made one in green and gold to use as a thank you for the scarf.  I used paper from the same stack, although this time it's metallic gold flowers on a green background.  


I embossed the gold panels with a Cuttlebug Oriental Weave embossing folder which seemed to make them super shiny with all the extra facets to reflect light.


I also added a gold glitter ball on top as shown in the assembly video, but rather than paint mine with glitter paint, I covered it in quick dry glue and sprinkled Martha Stewart ultrafine glitter on it and then let it dry for a few hours before gluing it on top with some Glossy Accents.

BONUS!  Dreaming Tree just added some FREE Autumn Nights and Frights panels for this lantern so it can be used for Halloween too!  Now I can't wait to make the spooky version!

I hope my neighbor enjoys the lantern. Thanks for stopping by to check them out!  


This post may contain affiliate links. If you purchase a product using the link I may receive a commission.  I only participate in affiliate programs for products or services that I personally use and recommend.  

Tuesday, May 31, 2016

Get Well Mailbox Bouquet


Here's just a quick post to show the Mailbox Bouquet card from Dreaming Tree that I made for a friend who was in the hospital. She loves bright colors, particularly pink and purple, so that's what I primarily used for her card.

I love how the colors, particularly the green, pop against the black mailbox background.  She's also a fan of black and red, so the black mailbox base with the glittery red flag were just right for this project.


For the mailbox side panels, I stamped a pretty floral pattern in Versamark ink and dusted it with gold Perfect Pearls powder.  What an easy way to create customized shimmery cardstock in whatever pattern or color you choose.

Thanks for stopping by!

This post may contain affiliate links. If you purchase a product using the link I may receive a commission.  I only participate in affiliate programs for products or services that I personally use and recommend.  

Saturday, February 20, 2016

Clover Treat Basket


Isn't this so cute for St. Paddy's Day?!!  I made this Clover Treat Basket using the FREE svg file from Dreaming Tree. 

I ran the body of the basket though a clover embossing folder prior to assembly.  I also embossed the top clover and handle with a dotted pattern.  I filled this up with some green paper shred and plastic gold coins to use as a little bit of holiday decor, but I really think this would be great as a fun gift with some chocolate coins in there instead. Yum!

There's an extra clover that cuts out that's meant to go on top of the handle, but I'm going to use it as a gift tag instead. 

Thanks for stopping by!

Monday, February 8, 2016

Valentine Tea Light Holder


Just a quick post to show off the cute little tea light holder I made using the FREE Valentine Tea Light Holder file from Dreaming Tree.

I did add a pink vellum liner because I love the look of the electronic tealights thought vellum - a much softer, more diffuse glow I think.

I also had lots of fun digging through my stash of blingy things to find some hearts and other glitzy stuff to add to the project. I think Valentine's Day is the perfect holiday to go a little nuts with rhinestones and shiny stuff!

Thanks for stopping by!

Saturday, October 31, 2015

Nativity Paperscape Card


I think the paperscape cards from Dreaming Tree are just so cool!  This Nativity card is from the Christmas Paperscape Cards collection.  As mentioned here previously, I just love projects that I can light up, so this is right up my alley. 

I frequently leave my cards unfinished (as I've done here) so that I can personalize them down the road when I decide who the recipient will be. I will likely add a foil message in the top section using my Minc machine, but I haven't made up my mind what I want to say yet.

I'm primarily posting this now because of the happy accident I discovered when gluing it all together. I used some starry looking paper from an old DCWV Christmas paper stack to cut out the background piece. It has the lyrics to "We Three Kings of Orient Are" printed in swirls all over the paper. I just stuck the 12x12" paper to my Cricut mat and hit go.

Check out where the "O Star of wonder..." lyric shows up on the paper.  The star placement couldn't be more perfect if I had planned it that way.  In fact, if I had tried to place the star where it landed, this probably would never have happened!!  #fuzzymathskills


I guess I was meant to use this paper for this particular project.  Couldn't be happier with the result.

Thanks for stopping by!

#xmaspaperscape3dsvg