Showing posts with label valentine. Show all posts

Wednesday, February 7, 2018

Truly, Madly, Deeply - FINALLY!


Grab some snacks and sit a spell, this is going to be a long post. You've been warned! 

When I first got a sneak peek of the Heart-Shaped Lantern that would be released in the new Truly, Madly, Deeply collection from Bird's SVGs, I was dazzled. I couldn't wait to build one of my own! 


Bird very cleverly created a separate cut out for the central vellum heart so that it could be embossed in an embossing folder - so cool!  Around the same time, I was watching a Jennifer McGuire video about alcohol ink lifting where she made some beautiful patterns on vellum. I was intrigued to try it and figured why not give it a go on my lantern.

So I inked up a piece of scrap vellum with some red and purple alcohol ink, grabbed a lacy Tim Holtz stencil and tested it out. Fun technique! 


Next I inked up my vellum heart and did the same thing. Unfortunately I forgot to take a picture of the heart after the ink was lifted, but you can see it in the finished lantern.


For the body of the lantern, I kept thinking about what colors I would use to really make it something that would fit into my home decor. I have some black wrought iron furniture with antique gold accents and I thought that might look really great.

I embossed the lid panels with a similar lacy Tim Holtz texture fade (embossing folder) and then rubbed over the embossing with some antique gold wax. I love how the embossing is highlighted this way.


I built the rest of my lantern and also rubbed some of the gold wax around the panels and edges and called it done.  


I liked it, but I just felt like it needed something else. The gold wax didn't come out as well on the body of the lantern as I would have liked. I put it on display and have been lighting it up every night for a week while I pondered my next step. 

Today, inspiration finally struck. I re-cut the offset panels for the outside of the lantern, but this time I used some Tim Holtz metallic kraft paper. I embossed the pieces, painted them with black paint and then wiped some away to get a worn brass look. I glued them to the lantern and now I'm so very happy with it!


Here's a view from the side:


You might wonder how I embossed the large front panel as it doesn't fit through most embossing machines. It's a trick I read about years ago and this was the first time I actually tried it. Rather than putting the embossing folder though a machine, you can roll over it with a rolling pin, or in my case, a brayer. 

The impression isn't as deep as if you ran it through a machine, but it's good enough!  I put a tan embossing mat down on my craft table and then the embossing folder with the paper inside of it and then went to town rolling over it with a LOT of pressure.  Persistence paid off though, and I think the embossing really makes this project come to life.


I added a color-changing electronic tea light inside and it looks magical as it cycles through every color of the rainbow. Watching it glow reminded me of a very unique place I visited as a teenager. 

I grew up less than an hour from Yale University and one of our high school teachers took us on a class trip to the Beinecke Rare Book and Manuscript Library. From the outside, it's an unusual looking building (photo from Google images), but nothing really spectacular. But notice all those square-ish panels...


...they are made of thin marble and when on the inside of the library on a sunny day, the whole place absolutely glows. It's really beautiful and something neat to see if you ever get the chance. You'd never imagine that looking at it from the outside. (Photo from Google images)


So now that I've taken you on a trip down memory lane, you can see why the lighted lantern reminded me of that beautiful glowing marble.


Still with me?  I'm almost done rambling on, I promise!  

If you've made this lantern, what did you do with all of those leftover hearts from your cutting mat? I couldn't bring myself to throw them away! 


Using some painter's tape, I carefully transferred the rows of hearts and glued them to a piece of 4" x 5.25" cardstock. Once they were all glued down, I ran the whole panel through my Cuttlebug with an embossing folder. Then I glued it onto a gold glitter pre-made A2 card.  Now I've got an extra card for the next time I need one. All I'll need to do is add a sentiment to the front and it'll be ready to go. 


I really appreciate the fact that you've stuck with me this far. I hope you didn't run out of snacks! Thanks for stopping by and I'd truly love to hear what you think of my lantern if you'd like to leave a comment below.

Friday, January 26, 2018

Batty for you!


I used a free Halloween file from Birds's SVGs to make the front of this card - the bat background can be found here. The svg is a square originally, but I stretched it to fit the front of my card and it really didn't distort the images. The sentiment is one I created in Cricut Design Space using one of my favorite free fonts, Milkshake, from Dafont.com. I went with eye-popping pink and purple for a fun Valentine's color scheme.

Speaking of eye-popping, you know that heart-eye emoji that is so popular on social media to express our love of whatever we're looking at? I totally used that idea when creating the inside of the card. 


I never got around to making the awesome Bat Pop-Out card from Bird's SVGs Creak 'n' Shriek collection last Halloween and was just looking for a reason. I'm also a fan of silly puns, so I thought this was a good one to use for Valentine's Day.  

I used some clear Wink of Stella on the wing 'ribs' to add a little contrast and shine. The teeth are cut from white glitter cardstock and really sparkle. I even painted Ms. Batty's toenails bright red with some Nuvo Drops so she's well manicured for the holiday.  


I love the surprise of opening a Valentine's Day card to find a silly bat making heart eyes at you!


Other sentiments that might be fun with this one include:

- Love you the moon and bat
- You drive me batty
- I want to have your rabies!
- I bat you don't know...
- Love bites

And while I was making the bat, I was thinking about the Shark Pop-Out card from the equally fun Jawsome collection, also from Bird's SVGs.  


You could add heart eyes to him too or maybe some sparkly red lipstick to make it a she-shark! Here's a few sentiment ideas for that too:

- You're a fin-tastic Valentine
- Love bites
- You're so cute I could just gobble you up


Thanks for stopping by to check out my batty Valentine's card. I'd love to hear what you think!

Tuesday, January 17, 2017

Love Bug Box


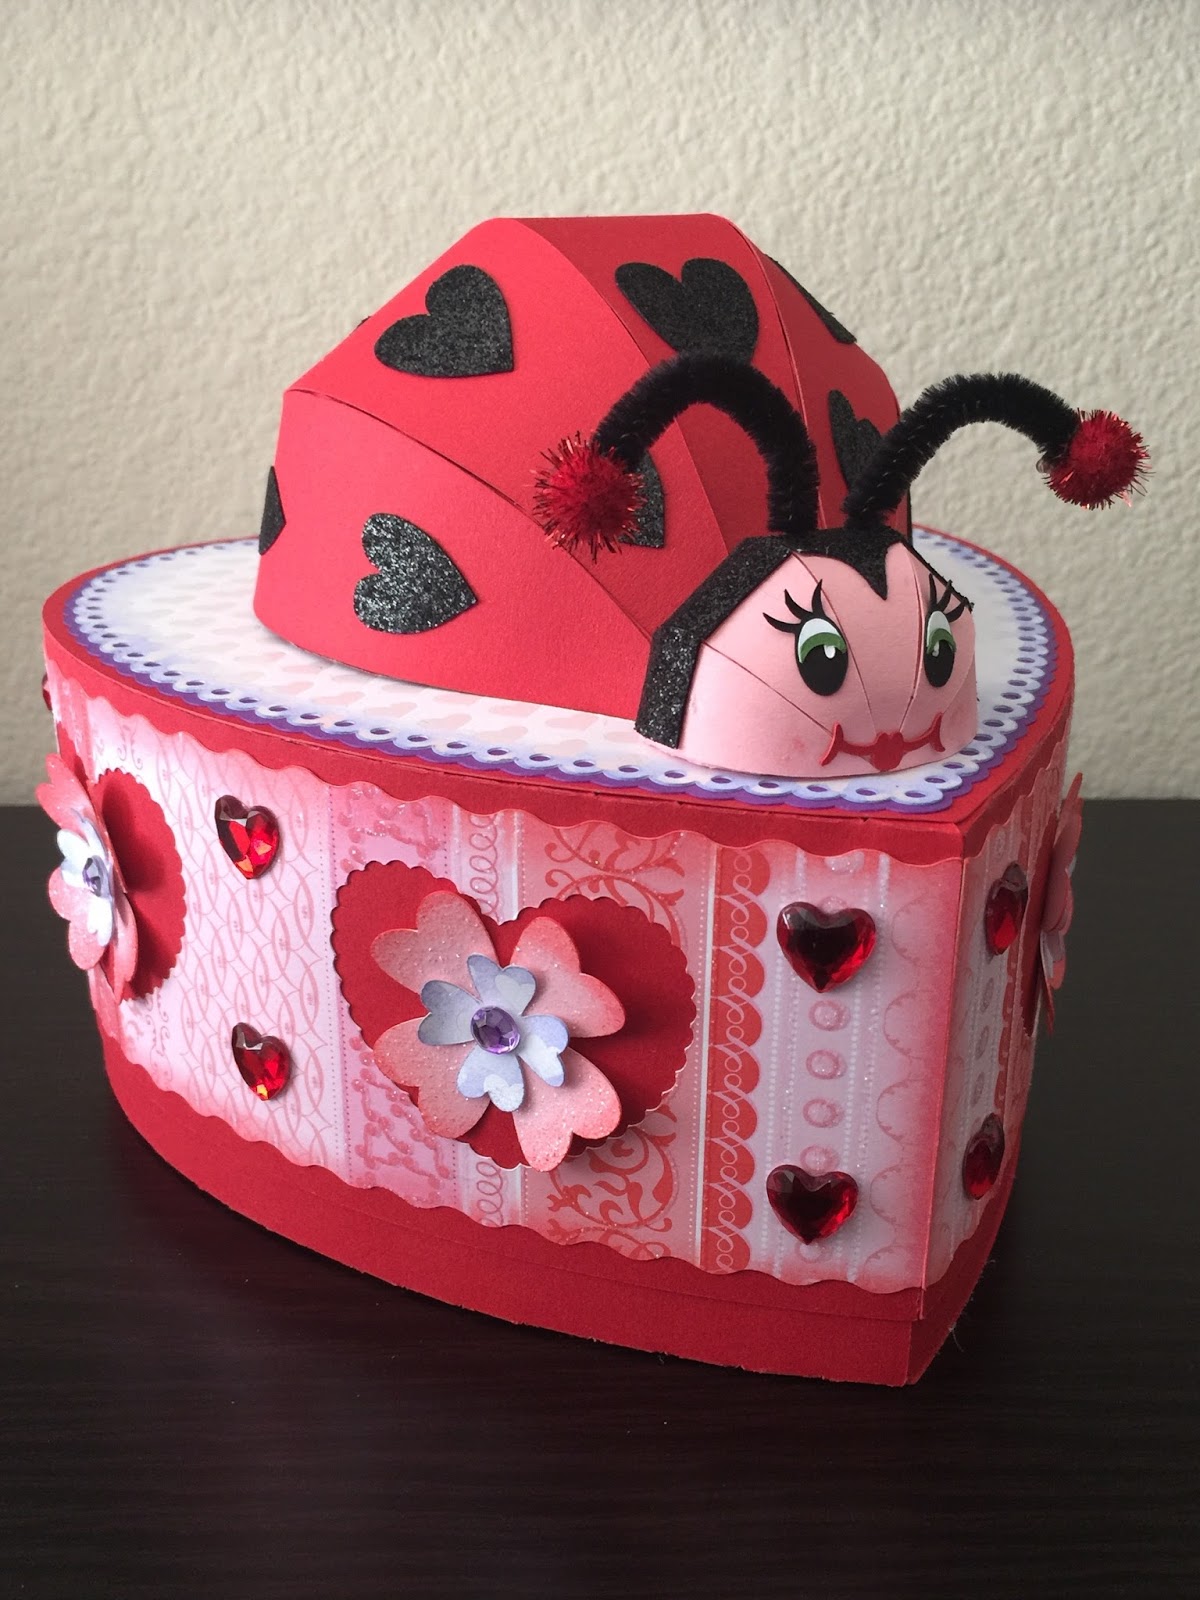
From the moment I saw the 'coming soon' post on Instagram for this ladybug box, I was in love! Ladybugs hold a special place in my heart and as a result, I have a small but unique collection of ladybug treasures that I've accumulated over the past 25 years. Because of this, I was understandably excited to see two of my favorite things, ladybugs and paper, come together in this adorable 3D box from Dreaming Tree's Love You More bundle.


I have no intention of using this box as a mailbox or bank, so I hid the contours for the mail slot when I was laying this out in Cricut Design Space prior to cutting. You can see above that I added some hearts to the back center panel of the ladybug's body where the slot would have been. I also changed the direction in which the hearts point.


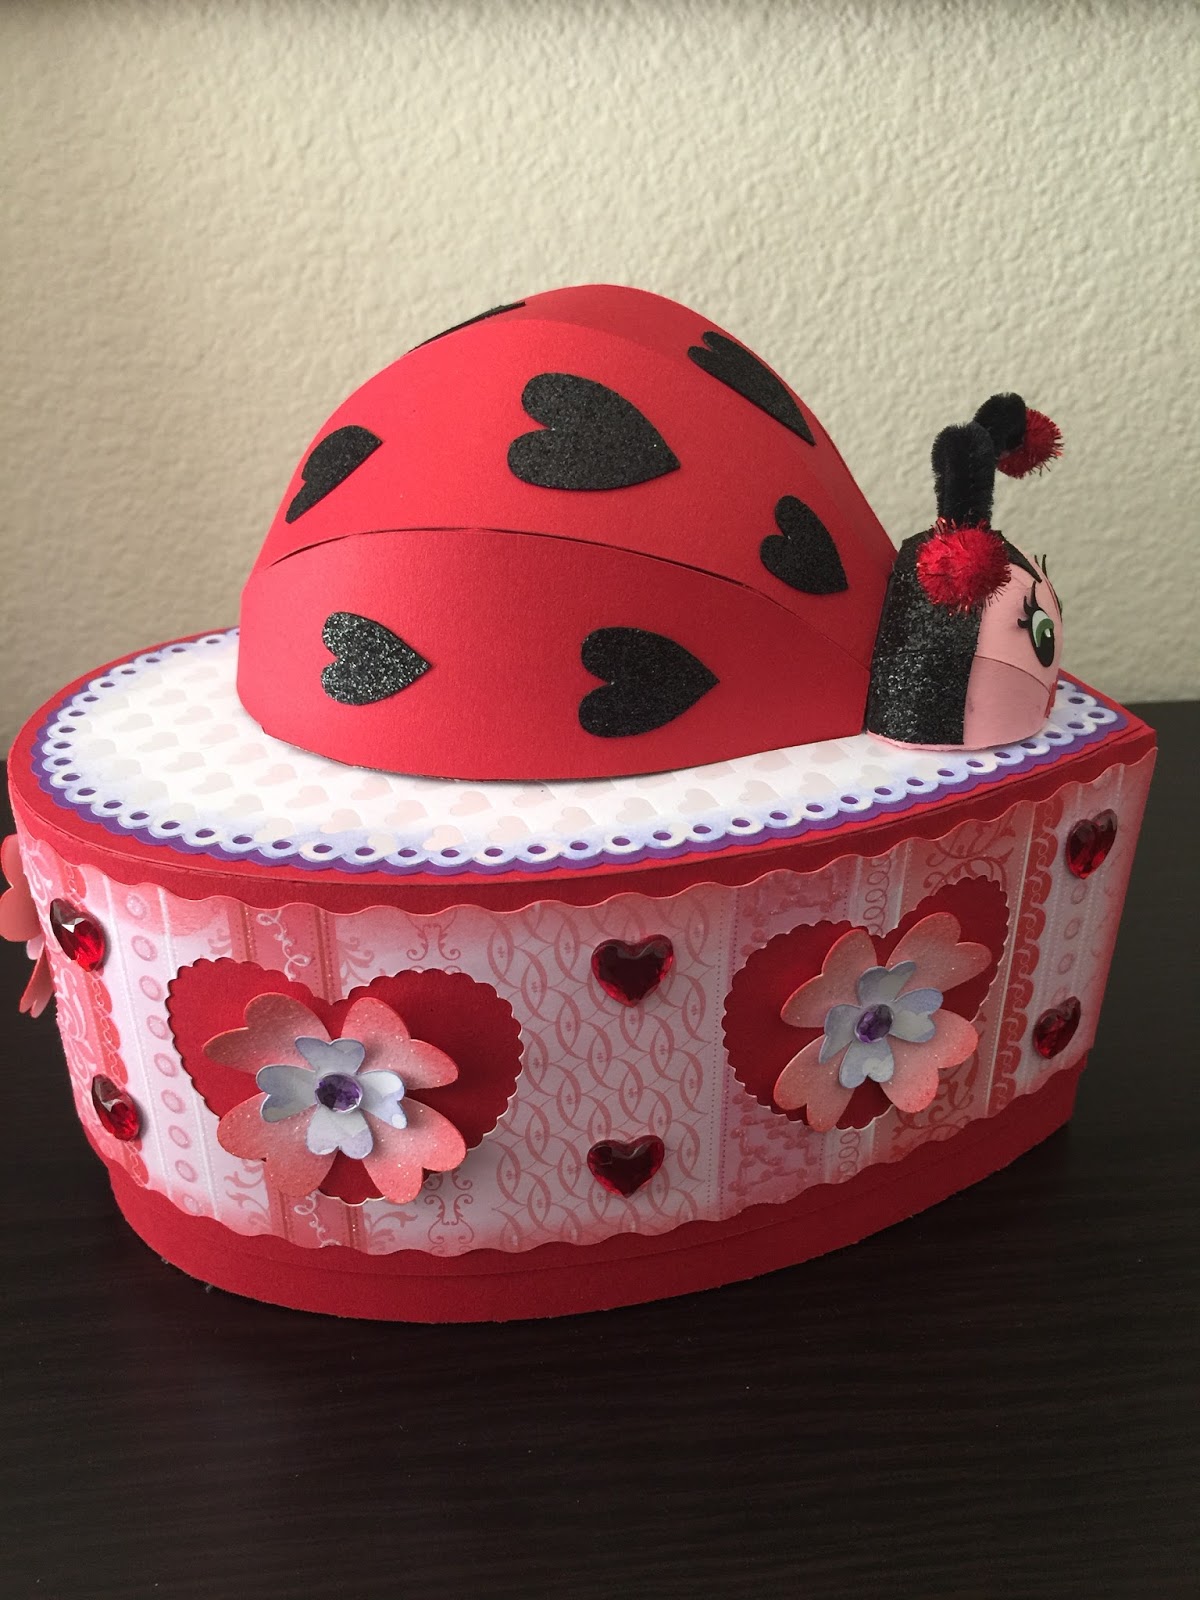
This side view shows how I redistributed the hearts on the ladybug body as well as some of the flower embellishments. 

I cut  the larger flower out of light pink glitter paper and inked the edges with some abandoned coral Distress ink. The smaller flowers were cut from the same pearl paper I used on the top of the box which is pearl heart print which I also inked with Distress, this time in shaded lilac.  


I liked how the purple gems in the original project tied the colors all together, but I didn't have any purple gems. Alcohol ink to the rescue! I simply dabbed some Purple Twilight alcohol ink from Ranger onto some clear gems and behold...purple gems! I use this little trick a lot to create gems, pearls and other embellishments that match my project color scheme.


The pipe cleaners I have are so thick and fuzzy that when I tried to loop them, they looked large and rather silly, so I kept them short and hot glued some glittery red pom poms to the ends.  


I love how this project came together and am so thrilled to finally have a 3D paper ladybug! I think I'll be making more of these in the future.  

Thanks for stopping by!  

Saturday, January 14, 2017

Lever Love


With Valentine's Day just a month away, I decided to make this Celtic Heart Lever Card from Bird's SVGs Celtic Charm Collection.

Celtic Charm SVG Collection from Bird's SVGs

Lever cards are so cool because of the lever action of the main focal point when the card is opened and closed. What a fun surprise for the recipient!


Because I fell in love with this shabby floral print paper, I picked a less conventional brown and pink color scheme for this card as it seemed to go together really well. I added some very tiny gems here and there on the floral print just to add a little bit of sparkle. 

On the inside, I did some stenciling on the three hearts using distress ink and the Tim Holtz layering stencil called Doily. I think the vintage lace pattern matches the shabby look of the patterned paper.


The sentiment panel in the middle (where you see the empty brown spot) is just waiting for me to decide what I want to write and/or stamp in there. 

I frequently leave the sentiment panels unattached until I'm sure of who the card is going to and what I want to say. That way, if I want to use a rubber stamp or add some inking, it's not too late because it's already been glued down. And let's face it, sometimes a stamped image doesn't turn out as you'd hoped. I like the option to be able to flip it over and use the other side rather than having to cut a new piece to glue over the first one in order to hide the mistake. Can you guess this may have happened to me a time or two? 

For another fun Valentine's Day card, you can find my post about this pretty rose card that was made from Bird's Roses are Pink collection last year. 


And, in addition to these lovely collections, Bird has section of completely free Valentine's projects which can be found here.  

As always, thanks for stopping by! I'd love to hear what you think about these projects.

Monday, February 8, 2016

Valentine Tea Light Holder


Just a quick post to show off the cute little tea light holder I made using the FREE Valentine Tea Light Holder file from Dreaming Tree.

I did add a pink vellum liner because I love the look of the electronic tealights thought vellum - a much softer, more diffuse glow I think.

I also had lots of fun digging through my stash of blingy things to find some hearts and other glitzy stuff to add to the project. I think Valentine's Day is the perfect holiday to go a little nuts with rhinestones and shiny stuff!

Thanks for stopping by!

Thursday, February 4, 2016

Candy Hearts Card


Using the FREE Mr. & Mrs. card from SVGCuts, I adapted this to a simple "I ♥ U" message for these candy hearts.  I think it's so cool how dimensional the message hearts look without even using pop dots.

When all was said and done, it felt like a LOT of pink to me, which isn't necessarily a bad thing, but something told me to just add something shiny to finish it off.  I stuck bling around the edges and now it really sparkles!

Monkey Business Trailing Hearts Card


I added a little bit of monkey business to the Trailing Hearts Card from SVGCuts Love Struck kit!  We have a family member who is crazy about sock monkeys and the color red, so I think she's really going to love receiving this card for Valentine's Day!

I had to leave off one of the hearts from the front of the card to make room for Mr. Monkey's legs, but I used it on the top of the sentiment panel inside the card.


I used a second piece of the sock monkey paper to make the envelope.  This is such cute paper that I found at Hobby Lobby.  I was thrilled to find the matching stickers too - that's where I got the monkey for the front. Isn't that pompom on his hat just adorable?

Thanks for stopping by!


Tuesday, January 26, 2016

Roses are Pink Card


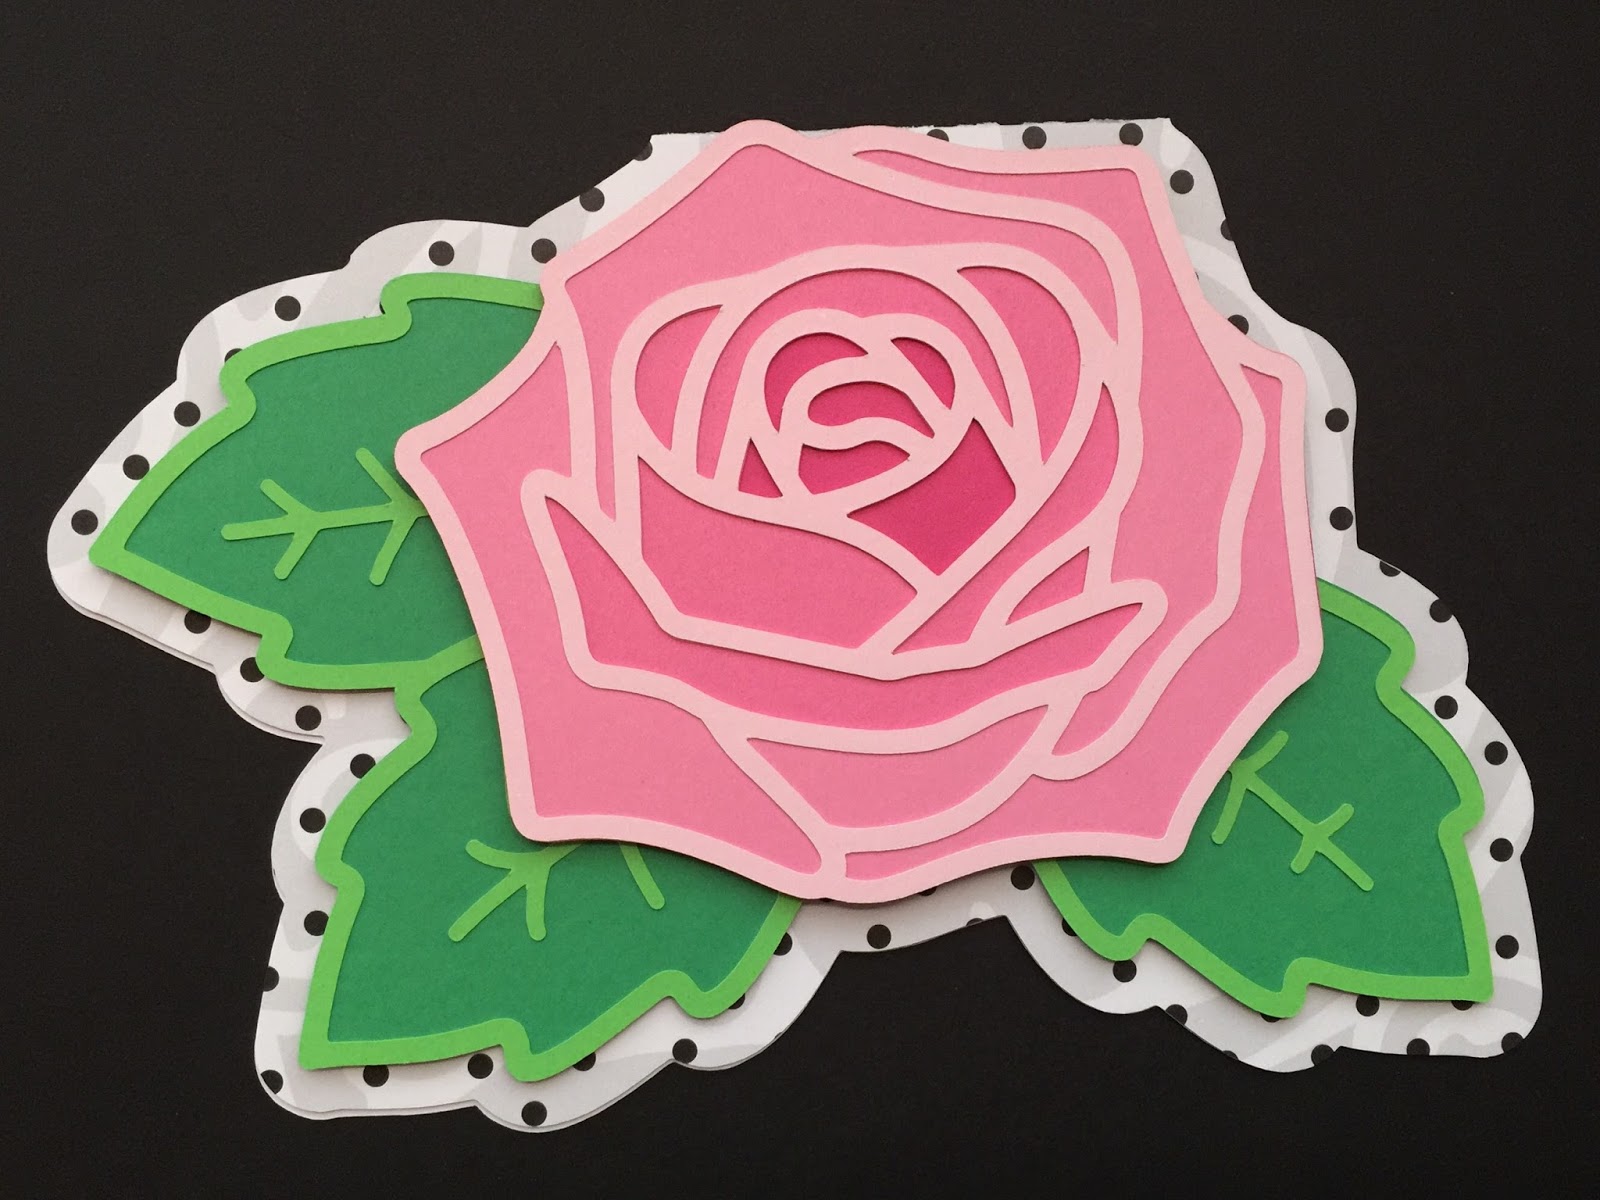
I just love this new Roses are Pink design from BirdsCards.  As is typical with one of Bird's designs, this was very easy to cut out and put together and has such a lovely end result!  I was inspired by her use of a black and white pattern for the base card and think the other colors really pop. I'm thinking I might have to try it in red, yellow, lavender, etc.

Not sure if I'll use this for an upcoming birthday card or maybe a Valentine's greeting.  I think this would also be gorgeous done as a wedding card in white pearl papers.  So many choices!

Bird also posted a new FREE Retro Rose Heart Card which is so pretty. I'll have to make that one next.

Thanks for stopping by!

Wednesday, January 20, 2016

Lovebug!


As part of my 2015 SVGCuts Spring Challenge entry, I made this ladybug out of the owl from the Enchanted Autumn kit by SVGCuts.  I'm a big fan of ladybugs and just HAD to have a 3D paper version for myself.  

Ultimately I just modified some of the panels on the head and body to eliminate the 'feather' cutouts and add some dots to my bug. Had I been really ambitious, I might have added wings, but I was really pressed for time!


The antenna cutouts came from the Peace On Earth card from the Joyful Christmas Cards kit, also from SVGCuts. It's actually the the swirly foliage on the dove piece but snipped, duplicated, reversed and ultimately welded together.  

I think she's the perfect addition to my Valentine's decor as a little lovebug.  It would be cute to create this using hearts instead of dots on the wings too.  So many possibilities!

Thanks for stopping by!

Ladybug Love Shack and Love Lantern


Last year I created this little ladybug love shack using the Hugs & Kisses kit from SVGCuts.  I'm a lover of all things ladybug, so the cute little fox was replaced with Ms. Bug which I cut from the Cricut Create A Critter cartridge. I had fun picking out all the polka dotted papers and bling for this project. Now that I've got it out for display again this year, I might see if I can add some hearts puffing up out of the chimney. As if there's not already enough glitter and bling!!! 


I also had fun altering the Damask Lantern from the Mistletoe Manor kit, also by SVGCuts.  I kept some of the damask pattern, but moved it around to fit in some of the swirly hearts from the For My Valentine kit.  I just love how this came out. I always look at things down the road and want to add more. I think this needs a glittery ribbon bow and/or maybe some flowers on top.  Adding it to my To Do list!

It's so much fun to decorate for Valentine's Day!

Thanks for stopping by!