Friday, March 11, 2016

Carrot Shadowbox


I thought glitter card stock was hard to photograph until I tried taking pictures of this shadowbox I just finished - very difficult with glare everywhere!  I think you get the idea though.

This shadowbox is a modified version of the one in the newly released Happy Easter kit from SVGCuts.  Last week I picked up a few shadowbox frames at Michaels when they were 65% off, but I only bought 9x9" square ones.  I certainly wasn't going to be able to fit six carrots in one of those, so I adapted by slightly enlarging the carrots and planning for two instead.

I just happened to have all the supplies on hand and was excited to get to work on this after the workday was done. What's better than a newly released svg kit on a Friday afternoon with a whole weekend of crafting possibilities ahead of you?  Not much!

Here's a picture I took at a bit of an angle - it seems to have helped with the glare for the most part.


I'd love to hear what you think - feel free to leave a comment below. Hope your weekend is great and thanks for stopping by!

Thursday, March 10, 2016

Easter Egg Box Card


When I first saw the sneak peak of the SVGCuts new Springtime Box Cards, I fell in love with this Easter egg card. It brought back some Easter memories from childhood.

We always found a diorama sugar egg in our Easter baskets each year and this card reminds me so much of them. That's why I used glittered cardstock to make this - it looks so very sugary and sweet!

The other thing I remember is my grandmother's Easter egg tree.  She used to make these beautiful diorama ornaments from real blown-out egg shells. They were covered in velvet, fabric and beautiful trims. The insides were often coated in glitter and had little figurines inside.  The tree was made of branches from the yard, painted white and anchored in a pretty crystal jar.  I remember sitting at the table studying all of the eggs and trying to decide which was my favorite.  What great memories this card kit brought to mind!


This picture isn't the greatest with it's dark background, but it shows off the glittery paper a little bit better. Glitter is so difficult to photograph sometimes!  I did a watercolor paint job on the flower petals using some Tim Holtz distress stains (weathered wood, broken china & mustard seed for the center) and once dry, tried to do a little shaping to give them a more dimensional look.  

The pearls are another thing I remember about those egg ornaments.  Some of them had pearls all around the opening of the 'window' on the front of the egg.  So of course I had to add some pearls to my card as a nod to nostalgia.

Thanks for stopping by!

Sunday, March 6, 2016

1970's 3D paper project!


I just stumbled across this picture the other day and thought I'd share,  

It was the late 1970's and this barn was built with construction paper and paste. I was pretty proud of it at the time!  I've been playing with paper every since.  

See, I told you I have a thing for paper!!


Going Green

My house is going green for the upcoming St. Paddy's Day holiday!  Here are a few projects I've put together so far:


Lucky the leprechaun is from the SVGCuts Lucky Day Bags and Boxes kit. I eliminated the bag and enlarged this to fit on an 8"x 10" burlap panel. Leprechauns are so protective of their gold, I gave this guy a gold glittered tooth so he doesn't have to worry about anybody stealing it when he's not looking.  No wonder he's so happy!

To go along with my laughing leprechaun, I also made the Beer Mug and Pot O'Gold favor from the SVGCuts  Feeling Lucky kit. From the smile on his face, I think Lucky has indulged in more than a few mugs of green beer!


Another hobby of mine is genealogy, and I've been working on researching the Irish roots of my husband's family. I think it would be cute to roll up a copy of the Irish side of the family tree like a scroll and send it to everybody tucked into one of these mugs. Now all I need is a few more hours in the day and I'll be all set!

Last but not least, here's a hat I made last year, but never got around to posting.  This is actually the top hat from the SVGCuts New Year's Eve kit, but I curled the heck out of the brim to make it look more like a silly leprechaun hat! The shape kind of reminds me of the Jiminy Cricket's top hat. 


I added a bunch of blingie things and flair to the front and a glittery clover on top from the Celtic Knots and Clover collection, also from SVGCuts.


These all look so cute on my bookshelves and really help liven things up for Spring!  I built the Gold Coin Inn last year, but am adding some embellishments to it this year, and it's not ready to be posted yet.  Hopefully I'll get to that in the next few days.  

And since St. Pat's and Easter are so close this year, I'll be putting out my Easter decorations too. More posts to come soon.

Thanks for stopping by!


Saturday, February 20, 2016

Clover Treat Basket


Isn't this so cute for St. Paddy's Day?!!  I made this Clover Treat Basket using the FREE svg file from Dreaming Tree. 

I ran the body of the basket though a clover embossing folder prior to assembly.  I also embossed the top clover and handle with a dotted pattern.  I filled this up with some green paper shred and plastic gold coins to use as a little bit of holiday decor, but I really think this would be great as a fun gift with some chocolate coins in there instead. Yum!

There's an extra clover that cuts out that's meant to go on top of the handle, but I'm going to use it as a gift tag instead. 

Thanks for stopping by!

Friday, February 19, 2016

Winter Lodge


I couldn't wait to make SVGCuts' Winter Lodge as soon as it came out last month, but despite the fact that I finished it weeks ago, I haven't had a chance to post it!

The 3D buildings can seem intimidating to build because they appear so detailed and look very involved. I'm happy to say that if you follow the instructions and watch the assembly video, it's really not that difficult and you end up with something that's so totally WOW!  I think it's all just a matter of taking it one step at a time and pacing yourself. No pressure - it's just paper!


And speaking of paper, I tried to keep my lodge pretty neutral in color because I plan to decorate the heck out of it for next Christmas and would hate to clash! I got lucky and found that Hobby Lobby had all of their paper half off the week I was needing some for the lodge, so I made sure I stocked up on the colors I wanted with a few extras thrown in for good measure. Like the pebble paper I used for the porch, chimney and front detail. And I love how the exterior LED lights make the glittery paper I used really sparkle. Kind of like snow!


I also love how Mary did the exterior lighting but I'm the first to admit that I have commitment issues when it comes to permanently affixing things with hot glue! So I took my strand of battery operated LED lights and stuck them on the underside of the roof using washi tape.  Admittedly, there are a few spots where the tape has lifted up slightly, but I just smoosh it down and it's good to go.

If you elect this option, the only other advice I can offer is to beware the pattern of washi tape you use and where you place it under the roof - when it's lit from inside, a printed washi tape can be see through the white roof!  There are plenty of strategic spots behind the snow and trim where you can stick it though.


I can't wait to deck the halls of this lodge for Christmas - I think it's going to look awesome!

Thanks for stopping by!!


Monday, February 8, 2016

Valentine Tea Light Holder


Just a quick post to show off the cute little tea light holder I made using the FREE Valentine Tea Light Holder file from Dreaming Tree.

I did add a pink vellum liner because I love the look of the electronic tealights thought vellum - a much softer, more diffuse glow I think.

I also had lots of fun digging through my stash of blingy things to find some hearts and other glitzy stuff to add to the project. I think Valentine's Day is the perfect holiday to go a little nuts with rhinestones and shiny stuff!

Thanks for stopping by!

Thursday, February 4, 2016

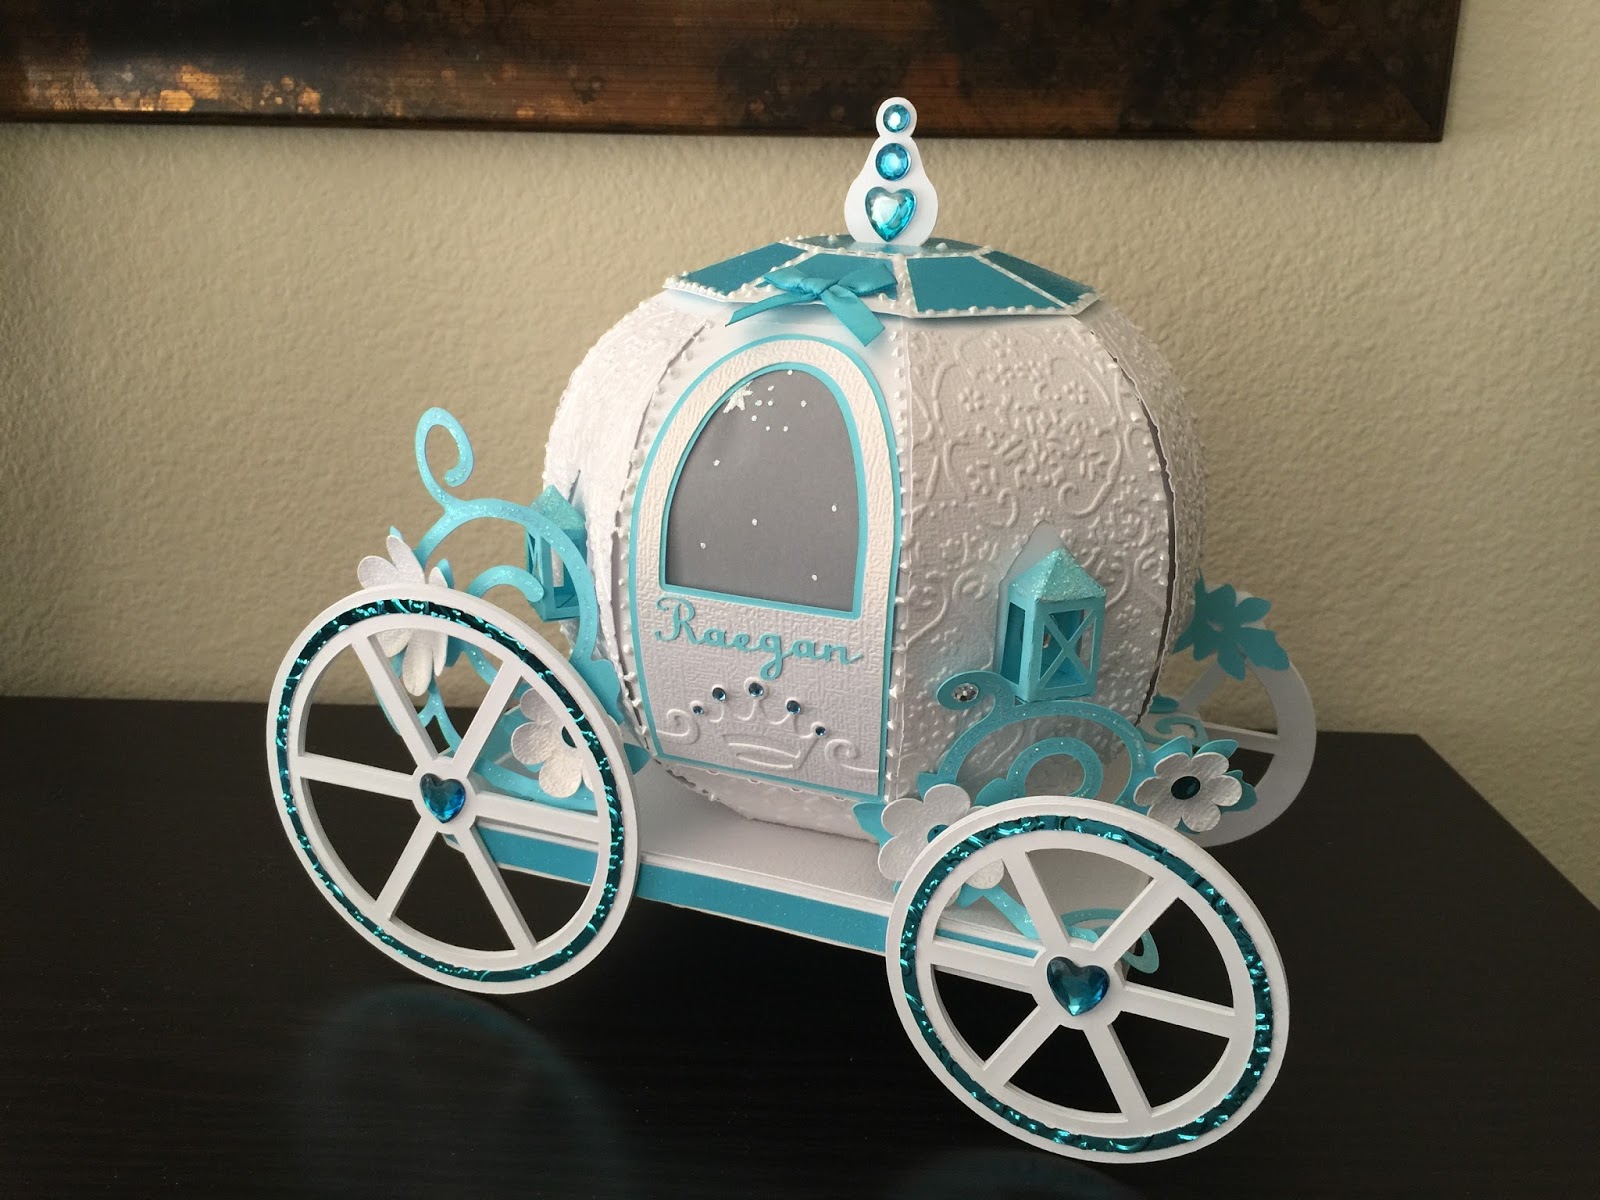
Cinderella's Carriage


Remember the Disney-themed explosion box I created for a friend for Christmas? Well, she liked it. She really, really liked it! She like it so much, that she wondered if I could create something special for her granddaughter who has a birthday this month. 

The gift for her is an annual pass MagicBand which I'm told is princess-themed, so how could I pass up the opportunity to create a carriage worthy of such a gift!  I just knew this was my chance to make the Pumpkin Carriage from SVGCuts Enchanted Autumn kit. 

Her grandmother and I poked around online searching for inspiration. We found this picture on Pinterest and both fell in love with it.  Hats off to whoever created that - it is SO beautiful! I even copied the 'stardust' on the vellum window!


I personalized it a bit by adding a name to the door with an embossed and then bejeweled crown (of course!) and used some Ranger alcohol ink to dye the clear heart gem stickers to match.  Since her birthday is close to Valentine's Day, you can't go wrong with hearts!  

I had lots of fun putting this together and really appreciate that such an elegant and intricate-looking project was really very simple to do.  I believe the soon-to-be four year old recipient is going to love it too!  

Thanks for stopping by!

Candy Hearts Card


Using the FREE Mr. & Mrs. card from SVGCuts, I adapted this to a simple "I ♥ U" message for these candy hearts.  I think it's so cool how dimensional the message hearts look without even using pop dots.

When all was said and done, it felt like a LOT of pink to me, which isn't necessarily a bad thing, but something told me to just add something shiny to finish it off.  I stuck bling around the edges and now it really sparkles!

Monkey Business Trailing Hearts Card


I added a little bit of monkey business to the Trailing Hearts Card from SVGCuts Love Struck kit!  We have a family member who is crazy about sock monkeys and the color red, so I think she's really going to love receiving this card for Valentine's Day!

I had to leave off one of the hearts from the front of the card to make room for Mr. Monkey's legs, but I used it on the top of the sentiment panel inside the card.


I used a second piece of the sock monkey paper to make the envelope.  This is such cute paper that I found at Hobby Lobby.  I was thrilled to find the matching stickers too - that's where I got the monkey for the front. Isn't that pompom on his hat just adorable?

Thanks for stopping by!