Showing posts with label Easter. Show all posts

Saturday, March 9, 2019

Here Comes Peter Cottontail


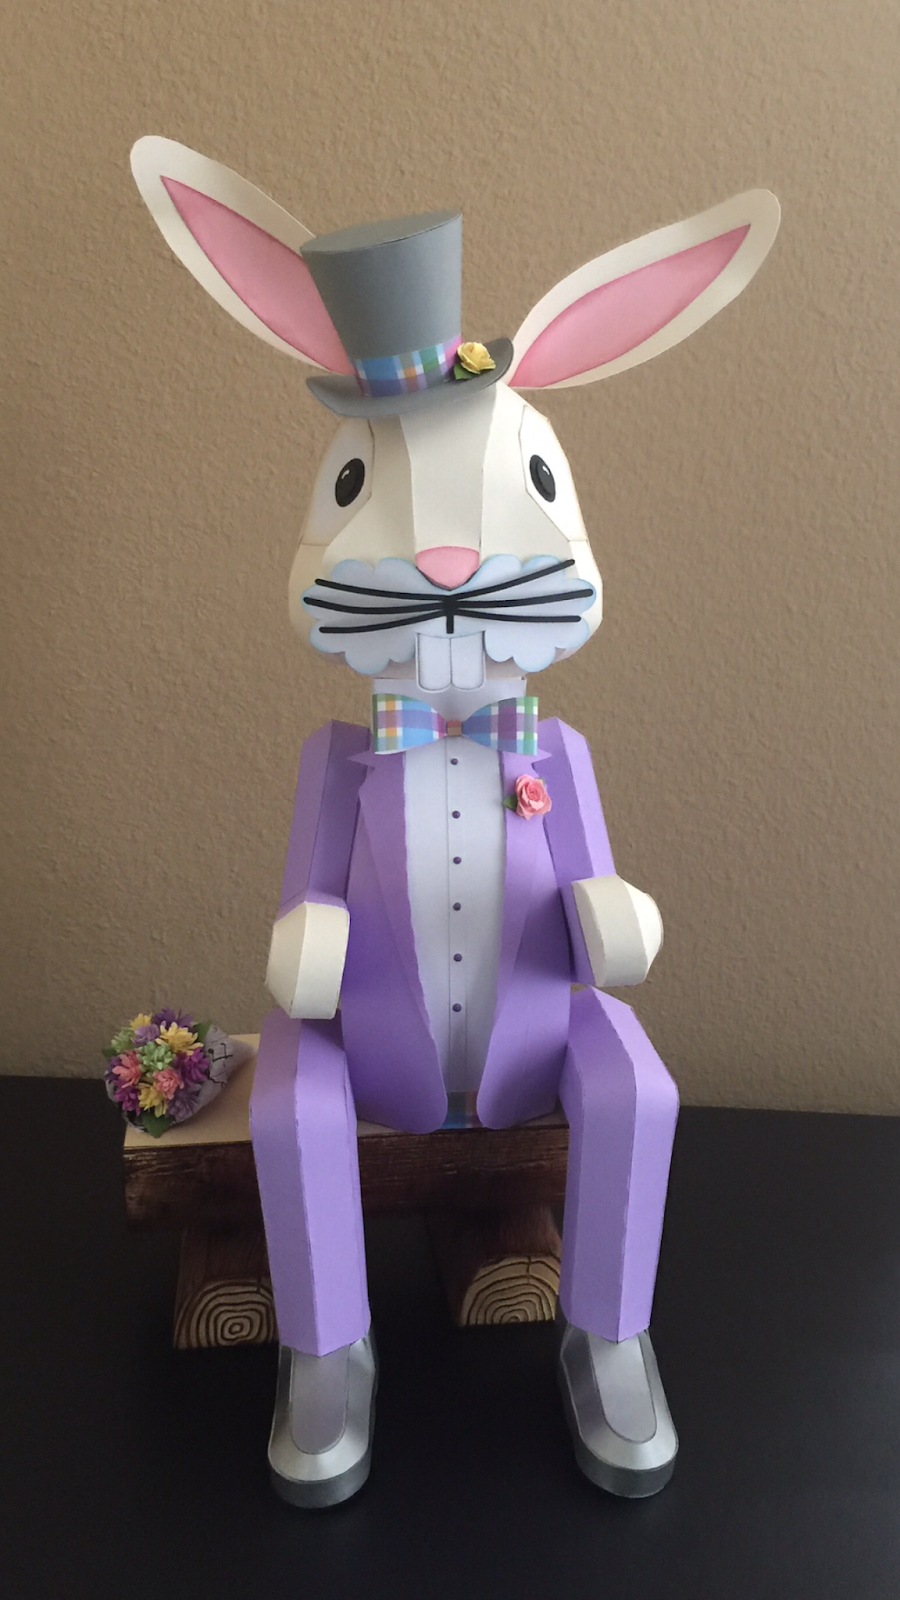
Hi there!  Just a quick post to show the fun Easter project I recently made.  This amazing SVG file is called Waiting For Easter. I purchased it from the Creatieve Papier Uitspattingen website. It includes the bunny with top hat as well as the log bench. All of the SVG pieces were cut out with my Cricut Maker.

I decided to dress Mr. Cottontail in some lovely pastel colors for Spring. I didn't think to take a lot of pictures while creating, but I'll give you what details I can.

The roses on his hat and lapel are from the Tiny Tattered Floral die by Tim Holtz.  I also used this die set to create the flowers for the bouquet on the bench. 

I used some pastel paper scraps to cut out the flowers, rolled them up and glued them to the top half of a 1-inch Styrofoam ball. Then I created a small paper cone and tucked some Tim Holtz collage paper around the edge to look like the pretty papers that often accompany a fresh flower bouquet.  I simply hot glued the flower ball into the cone to complete the bouquet.  I like to think that Mr. Cottontail is waiting for Ms. Bunny to arrive so he can present her with these lovely flowers on their way to Easter Brunch!


I wanted to give the log bench a realistic appearance, so I cut the outer panel pieces from Tim Holtz Distress Mixed Media Heavystock paper. I embossed the panels with the Tim Holtz Lumber 3D embossing folder to get the realistic log texture and then I colored the panels with Tim Holtz Distress Stain in Vintage Photo and Bundled Sage. 


After the stain dried, I used a blending tool to lightly ink over the top grain with some Vintage Photo Distress Ink. Obviously I have a slight obsession with all things Tim Holtz! I applied the panels to the assembled bench after slightly curving the pieces so they would glue down nicely.


I used another Tim Holtz embossing folder called Tree Rings to emboss the end pieces of the logs and again lightly inked over them with Vintage Photo Distress Ink.  I used the exact same methods for the larger log and assembled my bench with some hot glue.


I'm really so thrilled with how the bench turned out!  

For the final detail, I added a white pom pom tail to the back of Mr. Cottontail with some hot glue. It seemed like the perfect finishing touch. 


With Easter being so late this year, I find myself happy to have completed this project early so that I can enjoy looking at it for a while.  I really hopped right on it this year!  Pun intended.

Here's one last look at the whole project:


Thanks for stopping by! 


Monday, March 6, 2017

I'm so EGG-cited about these FAUXberge eggs!


I was already pretty excited about the new Eggstravagance kit from Bird's SVGs when I found out that the largest white and gold egg shown below is a luminary. For someone like me who particularly loves projects that glitter and glow, this is majorly EGG-citing!  The blingy possibilities for these Faberge-inspired beauties just makes my soul happy. 


The best part is that this kit was just released yesterday and is ON SALE for a limited time!

I used some metallic pink cardstock for my egg, although I really love Bird's egg all in gold. It's so luxurious looking! I definitely need to stock up on some more metallics and bling for future projects.  I planned to add some more pearls around the smaller rings of the pedestal, but didn't have as many as I thought. Oh well, just one more excuse to shop for craft supplies!


I had fun putting this together and even more fun lighting it up when I was done. I used a color changing electronic tea light under the shade and it is so pretty as it transitions through a rainbow of colors.  


Incidentally, if you're looking for the perfect bag in which to gift one of these beautiful eggs, you should definitely check out the Easter Egg gift bag from Bird's Easter Egg Hunt kit shown below. The bag could be made with matching metallic details and gems added on the outside.  What an elegant presentation that would make!


Thanks so much for stopping by! I'd love to hear what you think. 

Thursday, March 17, 2016

Distressed Bunny Marquee


**UPDATED AT BOTTOM**


I've had so much fun combining two of my favorite things to create this distressed bunny marquee. Those two things are a wonderful design from SVGCuts and digging into my stash of Tim Holtz supplies!

The Bunny Marquee Sign is from SVGCuts Happy Easter kit and I was eager to make it as I love having seasonal marquee signs around the house.   I actually already have a very Spring-ish Heidi Swapp butterfly marquee done in pastel colors, so I wanted to go another way with this project.

I've had this sheet of wonderful Tim Holtz Easter paper in my supply for years! It was time to do something fun with it.  I build the base of the bunny with a dark chocolate brown cardstock and actually then hand cut the bunny paper panel because if I cut it at the angle that my Cricut would allow, the bunny art would have been on a diagonal. I could have used my 24" Cricut mat and adjusted it for that, but it was such an easy manual cut, I just traced the cutout of the back panel and used my scissors.


I had a piece of some really cool ruler paper from another Tim Holtz paper pack and decided to use that as the outside band. I think it really gives this such a fun and vintage, distressed look.  I distressed around the edges of all the papers with some Ranger Distress ink in walnut stain.

You might wonder why I went multicolored with the bulb caps.  I have a few reasons and actually, this is still kind of a work in progress.  I alternated the pink and mint bulb caps on my butterfly marquee, and really loved the effect. However, this left me with 12 of each color for this project. It actually works pretty well with the bunny paper I used and I think it looks nice when lit.


BUT...I have a vision to make this even better and I just need to get to the craft store and buy some clear faceted bulb caps to finish this off.  As I mentioned, I love using Tim Holtz distress products and I really think this project would look so cool with some vintage looking mercury glass bulbs.  I experimented with some alcohol ink and clear bulb caps and came up with this altered bulb:


I LOVE how it came out!  I think I will love it even more if I can do this to a faceted bulb where the alcohol ink will get into all the nooks and crannies!  Here was my experiment with the distressed bulb on the lit bunny. 


 This is just what I envisioned! It also knocks down some of the brightness which I like too. So hopefully I'll get my hands on some clear faceted bulb caps this weekend, distress the heck out of them and give my bunny a quick and grungy makeover!

Thanks for stopping by and as always, I'd love to hear what you think!

**3/30/16 Update**

I forgot to update with the final version. Here's my bunny with the distressed bulbs - I think I love it!


Friday, March 11, 2016

Carrot Shadowbox


I thought glitter card stock was hard to photograph until I tried taking pictures of this shadowbox I just finished - very difficult with glare everywhere!  I think you get the idea though.

This shadowbox is a modified version of the one in the newly released Happy Easter kit from SVGCuts.  Last week I picked up a few shadowbox frames at Michaels when they were 65% off, but I only bought 9x9" square ones.  I certainly wasn't going to be able to fit six carrots in one of those, so I adapted by slightly enlarging the carrots and planning for two instead.

I just happened to have all the supplies on hand and was excited to get to work on this after the workday was done. What's better than a newly released svg kit on a Friday afternoon with a whole weekend of crafting possibilities ahead of you?  Not much!

Here's a picture I took at a bit of an angle - it seems to have helped with the glare for the most part.


I'd love to hear what you think - feel free to leave a comment below. Hope your weekend is great and thanks for stopping by!

Thursday, March 10, 2016

Easter Egg Box Card


When I first saw the sneak peak of the SVGCuts new Springtime Box Cards, I fell in love with this Easter egg card. It brought back some Easter memories from childhood.

We always found a diorama sugar egg in our Easter baskets each year and this card reminds me so much of them. That's why I used glittered cardstock to make this - it looks so very sugary and sweet!

The other thing I remember is my grandmother's Easter egg tree.  She used to make these beautiful diorama ornaments from real blown-out egg shells. They were covered in velvet, fabric and beautiful trims. The insides were often coated in glitter and had little figurines inside.  The tree was made of branches from the yard, painted white and anchored in a pretty crystal jar.  I remember sitting at the table studying all of the eggs and trying to decide which was my favorite.  What great memories this card kit brought to mind!


This picture isn't the greatest with it's dark background, but it shows off the glittery paper a little bit better. Glitter is so difficult to photograph sometimes!  I did a watercolor paint job on the flower petals using some Tim Holtz distress stains (weathered wood, broken china & mustard seed for the center) and once dry, tried to do a little shaping to give them a more dimensional look.  

The pearls are another thing I remember about those egg ornaments.  Some of them had pearls all around the opening of the 'window' on the front of the egg.  So of course I had to add some pearls to my card as a nod to nostalgia.

Thanks for stopping by!