Saturday, February 20, 2016

Clover Treat Basket


Isn't this so cute for St. Paddy's Day?!!  I made this Clover Treat Basket using the FREE svg file from Dreaming Tree. 

I ran the body of the basket though a clover embossing folder prior to assembly.  I also embossed the top clover and handle with a dotted pattern.  I filled this up with some green paper shred and plastic gold coins to use as a little bit of holiday decor, but I really think this would be great as a fun gift with some chocolate coins in there instead. Yum!

There's an extra clover that cuts out that's meant to go on top of the handle, but I'm going to use it as a gift tag instead. 

Thanks for stopping by!

Friday, February 19, 2016

Winter Lodge


I couldn't wait to make SVGCuts' Winter Lodge as soon as it came out last month, but despite the fact that I finished it weeks ago, I haven't had a chance to post it!

The 3D buildings can seem intimidating to build because they appear so detailed and look very involved. I'm happy to say that if you follow the instructions and watch the assembly video, it's really not that difficult and you end up with something that's so totally WOW!  I think it's all just a matter of taking it one step at a time and pacing yourself. No pressure - it's just paper!


And speaking of paper, I tried to keep my lodge pretty neutral in color because I plan to decorate the heck out of it for next Christmas and would hate to clash! I got lucky and found that Hobby Lobby had all of their paper half off the week I was needing some for the lodge, so I made sure I stocked up on the colors I wanted with a few extras thrown in for good measure. Like the pebble paper I used for the porch, chimney and front detail. And I love how the exterior LED lights make the glittery paper I used really sparkle. Kind of like snow!


I also love how Mary did the exterior lighting but I'm the first to admit that I have commitment issues when it comes to permanently affixing things with hot glue! So I took my strand of battery operated LED lights and stuck them on the underside of the roof using washi tape.  Admittedly, there are a few spots where the tape has lifted up slightly, but I just smoosh it down and it's good to go.

If you elect this option, the only other advice I can offer is to beware the pattern of washi tape you use and where you place it under the roof - when it's lit from inside, a printed washi tape can be see through the white roof!  There are plenty of strategic spots behind the snow and trim where you can stick it though.


I can't wait to deck the halls of this lodge for Christmas - I think it's going to look awesome!

Thanks for stopping by!!


Monday, February 8, 2016

Valentine Tea Light Holder


Just a quick post to show off the cute little tea light holder I made using the FREE Valentine Tea Light Holder file from Dreaming Tree.

I did add a pink vellum liner because I love the look of the electronic tealights thought vellum - a much softer, more diffuse glow I think.

I also had lots of fun digging through my stash of blingy things to find some hearts and other glitzy stuff to add to the project. I think Valentine's Day is the perfect holiday to go a little nuts with rhinestones and shiny stuff!

Thanks for stopping by!

Thursday, February 4, 2016

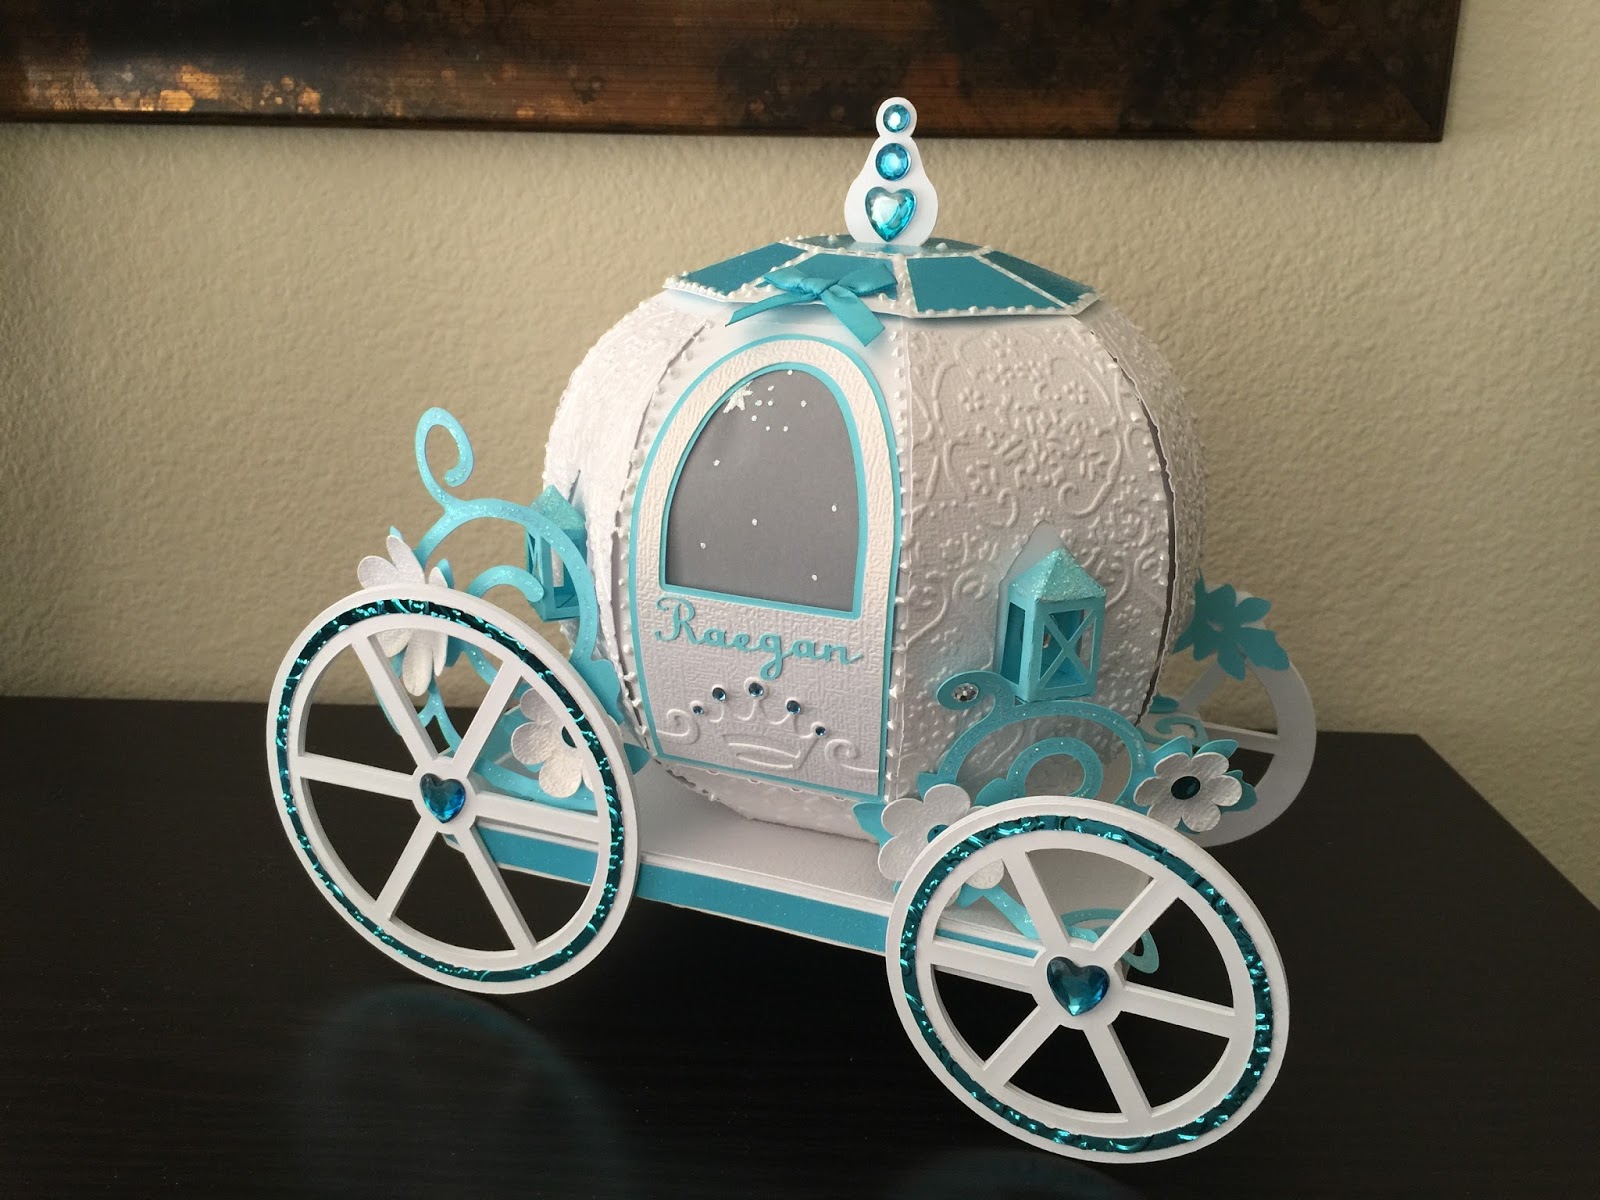
Cinderella's Carriage


Remember the Disney-themed explosion box I created for a friend for Christmas? Well, she liked it. She really, really liked it! She like it so much, that she wondered if I could create something special for her granddaughter who has a birthday this month. 

The gift for her is an annual pass MagicBand which I'm told is princess-themed, so how could I pass up the opportunity to create a carriage worthy of such a gift!  I just knew this was my chance to make the Pumpkin Carriage from SVGCuts Enchanted Autumn kit. 

Her grandmother and I poked around online searching for inspiration. We found this picture on Pinterest and both fell in love with it.  Hats off to whoever created that - it is SO beautiful! I even copied the 'stardust' on the vellum window!


I personalized it a bit by adding a name to the door with an embossed and then bejeweled crown (of course!) and used some Ranger alcohol ink to dye the clear heart gem stickers to match.  Since her birthday is close to Valentine's Day, you can't go wrong with hearts!  

I had lots of fun putting this together and really appreciate that such an elegant and intricate-looking project was really very simple to do.  I believe the soon-to-be four year old recipient is going to love it too!  

Thanks for stopping by!

Candy Hearts Card


Using the FREE Mr. & Mrs. card from SVGCuts, I adapted this to a simple "I ♥ U" message for these candy hearts.  I think it's so cool how dimensional the message hearts look without even using pop dots.

When all was said and done, it felt like a LOT of pink to me, which isn't necessarily a bad thing, but something told me to just add something shiny to finish it off.  I stuck bling around the edges and now it really sparkles!

Monkey Business Trailing Hearts Card


I added a little bit of monkey business to the Trailing Hearts Card from SVGCuts Love Struck kit!  We have a family member who is crazy about sock monkeys and the color red, so I think she's really going to love receiving this card for Valentine's Day!

I had to leave off one of the hearts from the front of the card to make room for Mr. Monkey's legs, but I used it on the top of the sentiment panel inside the card.


I used a second piece of the sock monkey paper to make the envelope.  This is such cute paper that I found at Hobby Lobby.  I was thrilled to find the matching stickers too - that's where I got the monkey for the front. Isn't that pompom on his hat just adorable?

Thanks for stopping by!


Tuesday, January 26, 2016

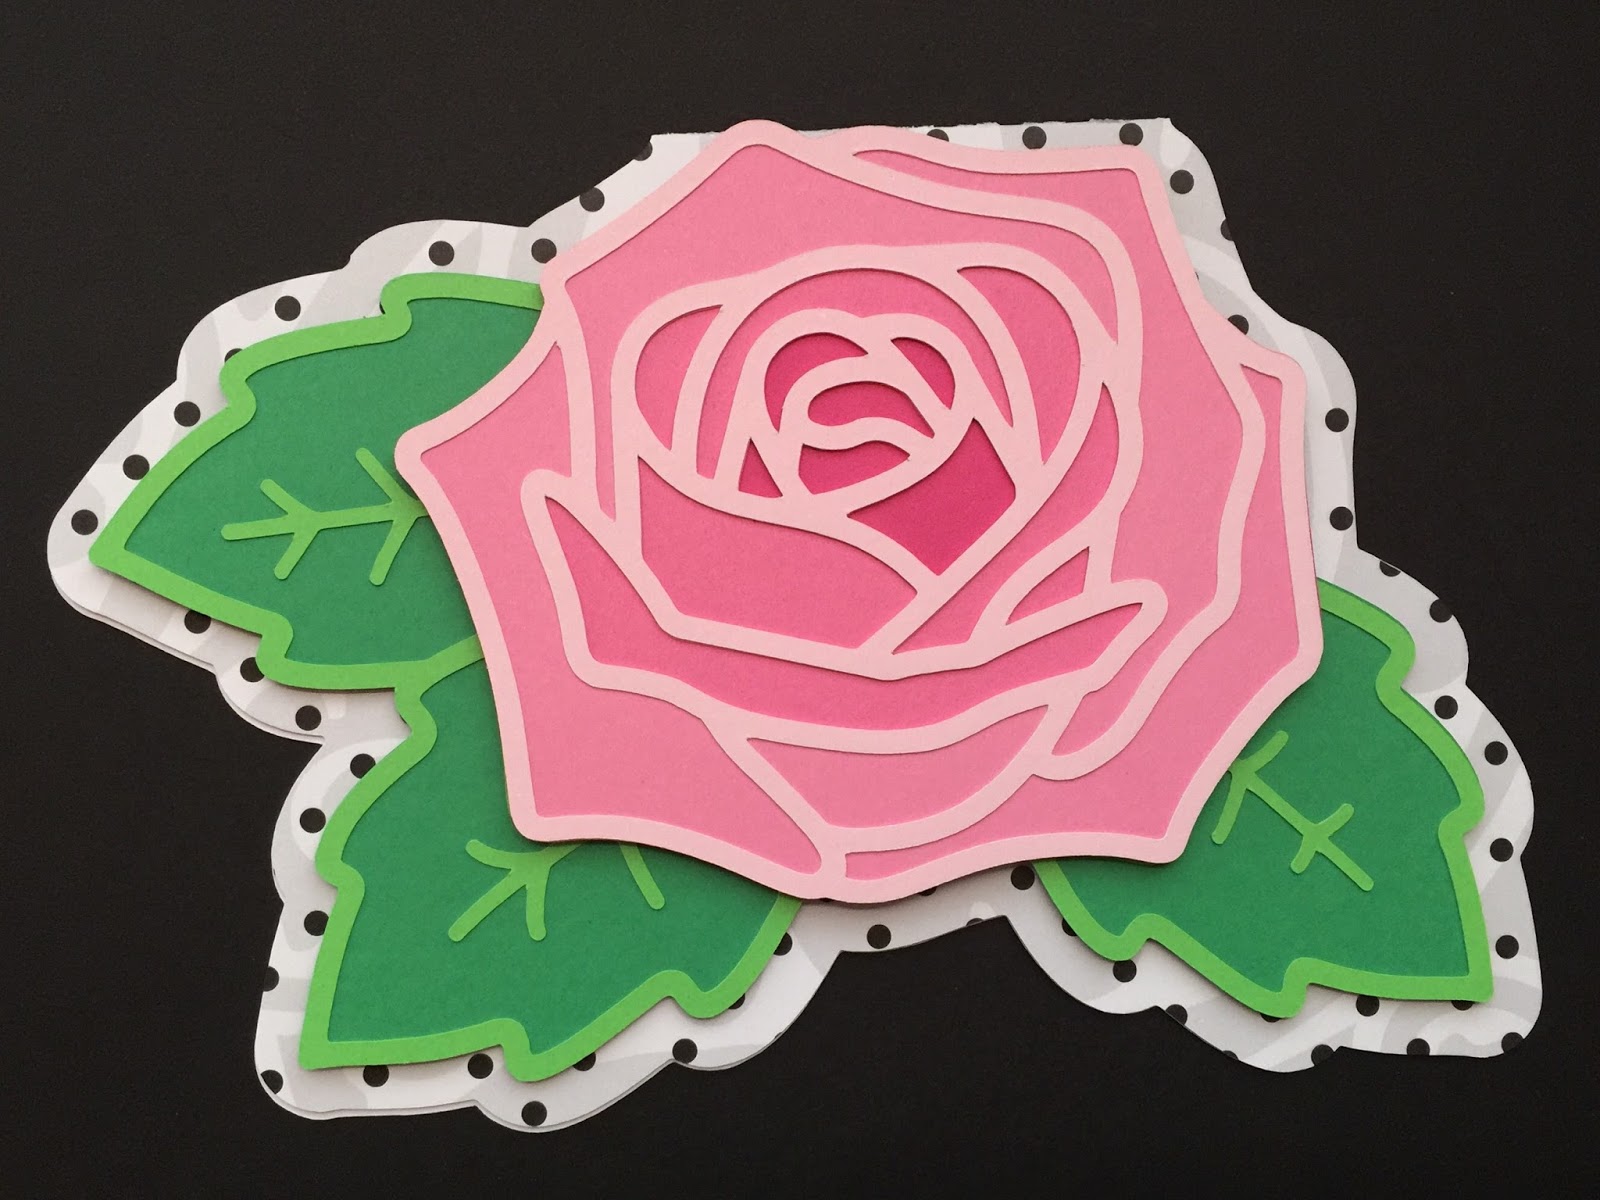
Roses are Pink Card


I just love this new Roses are Pink design from BirdsCards.  As is typical with one of Bird's designs, this was very easy to cut out and put together and has such a lovely end result!  I was inspired by her use of a black and white pattern for the base card and think the other colors really pop. I'm thinking I might have to try it in red, yellow, lavender, etc.

Not sure if I'll use this for an upcoming birthday card or maybe a Valentine's greeting.  I think this would also be gorgeous done as a wedding card in white pearl papers.  So many choices!

Bird also posted a new FREE Retro Rose Heart Card which is so pretty. I'll have to make that one next.

Thanks for stopping by!

Wednesday, January 20, 2016

Lovebug!


As part of my 2015 SVGCuts Spring Challenge entry, I made this ladybug out of the owl from the Enchanted Autumn kit by SVGCuts.  I'm a big fan of ladybugs and just HAD to have a 3D paper version for myself.  

Ultimately I just modified some of the panels on the head and body to eliminate the 'feather' cutouts and add some dots to my bug. Had I been really ambitious, I might have added wings, but I was really pressed for time!


The antenna cutouts came from the Peace On Earth card from the Joyful Christmas Cards kit, also from SVGCuts. It's actually the the swirly foliage on the dove piece but snipped, duplicated, reversed and ultimately welded together.  

I think she's the perfect addition to my Valentine's decor as a little lovebug.  It would be cute to create this using hearts instead of dots on the wings too.  So many possibilities!

Thanks for stopping by!

Ladybug Love Shack and Love Lantern


Last year I created this little ladybug love shack using the Hugs & Kisses kit from SVGCuts.  I'm a lover of all things ladybug, so the cute little fox was replaced with Ms. Bug which I cut from the Cricut Create A Critter cartridge. I had fun picking out all the polka dotted papers and bling for this project. Now that I've got it out for display again this year, I might see if I can add some hearts puffing up out of the chimney. As if there's not already enough glitter and bling!!! 


I also had fun altering the Damask Lantern from the Mistletoe Manor kit, also by SVGCuts.  I kept some of the damask pattern, but moved it around to fit in some of the swirly hearts from the For My Valentine kit.  I just love how this came out. I always look at things down the road and want to add more. I think this needs a glittery ribbon bow and/or maybe some flowers on top.  Adding it to my To Do list!

It's so much fun to decorate for Valentine's Day!

Thanks for stopping by!

Saturday, December 26, 2015

3D Christmas Village

Here's a quick peak at the growing Christmas village I've been building using many different SVGCuts.com kits.  I built some of these last year and just got around to embellishing them this year. Others were built over the past few months and are still works in progress.  Most of them sit on a black bookshelf, so the photos aren't the greatest. 

I have so much fun picking out the papers and thinking of ways to make these unique.  And the more I look at the same kits done by others, I get even more wonderful ideas and inspiration.  

I hope you enjoy this photo gallery of Christmas Cove, a coastal village of my own imagination which is a very merry place to live!


I added some icicles to "Flurry Chapel," aka the Silent Night church.


Got bling? I went a little crazy adding sparkle and shine to this gingerbread house from the Happy Holidays kit.


This is the 3D Snowy House from the Winter's Chill kit.  I added a 1" miniaturized wreath from the Silent Night kit. Thank goodness for fork bows, because there was no other way I would have been able to tie one that small! I also added some coach lights from the Enchanted Autumn Pumpkin Carriage. 


I used one of the snowflakes from the Winter Gazebo kit and fashioned a weathervane of sorts to go on top of the gazebo. The pine garland is Pine Twine from Tim Holtz. I keep meaning to add some shadow figures to this so they show through when it's lit up. Maybe next year!  


This is Maple Manor all decked out for Christmas. I added a widow's walk to the top as I grew up in New England and remember seeing so many beautiful historic homes along the coast with them on the roof.  I added some sidelights around the front door and made a wreath from Tim Holtz Boxwood twine and jingle brads.  I never got around to adding a fence and some other details to this project, so I guess I'll be decking this one out next year as well.


Last but certainly not least, here's Candy Cane light (from the Seaside kit) along with the Christmas Tree from Santa's Surprises. So much more I want to do to further embellish these too, all I need is time!

Thanks for joining me on this short tour through Christmas Cove.  Happy Holidays!