Monday, April 25, 2016
Teapot Box Card
Just a quick post to show what I've been doing other than making trophies - I made this adorable teapot box card from SVGCuts new Worlds Best Mom kit.
I'm actually going to be using this as a birthday card which is just perfect for the tea-loving recipient.
This was quite easy to put together and just so cute!
I did add a little pearl to the center of the orange flower after this picture was taken.
Thanks for stopping by!
Trophies completed!
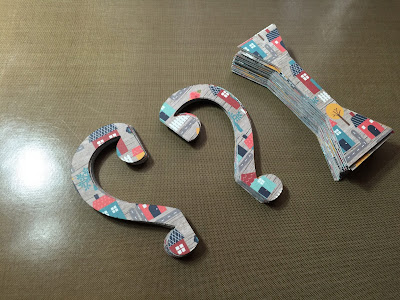
43 pieces of cardstock and a lot of glue later, I have finally finished the trophies I told you about here.
These will have some 'stuff' in them for the winners of a contest we're having at work. To understand why I chose the paper I did, you should probably know that the contest is a paper mache house decorating contest.
I was beyond thrilled when I found this adorable Houses paper by Echo Park that not only tied in the houses and neighborhood theme, but also has the colors most often used to designate first, second and third place. It's like it was meant to be.
I also lucked out when I found a 5-for-$1 cardstock sale happening at the craft store that week and managed to get all my solid sheets (30 pieces) for only $6. Score!
I had piles of paper pieces everywhere! Here's 60 handle panels and 90 base panels:
And here are a few of the handles in early stages on my assembly line - I found it easiest to do them in batches so I could work on one while others got some good glue dry time:
I chose to use some Tim Holtz Deco Tape to go around the top and bottom instead of cutting out the provided pieces in the kit. The tape was easy to just wrap around and cut where needed, but I did have to supplement with a few dots of glue here and there as the tape isn't super sticky.
When I started this project, I toyed with the idea of adding a little fenced yard as a base for each trophy, but then it started getting out of hand. I wanted to add flowers to the fence and a mailbox and grass and...well, you get the idea. I reigned myself in and made the decision to keep it simple.
They are done and delivered at last. Now I just have to decorate a paper mache house to try to win one!
Thanks so much for stopping by. I'd love to hear your thoughts on this project.
Thursday, April 14, 2016
15 Trophies!
For anybody
wondering why I haven't posted any paper projects recently, it's because I made
the crazy offer to build 15 trophies using the Dreaming Tree Irish Coffee Mug file, so I've been pretty busy gluing my life away.
12 TAGS OF 2016: April Edition
This was an April 2016 winner on timholtz.com!!
Tim's original tag can be found here, and this is my take on this month's technique remix.
For the resist portion of the technique, I used a 'splotchy' background stamp that reminds me of bubbles which I stamped using white Distress paint and then added layers of color with both Distress stains and Distress ink. I also gave the tag a light mist of opalescent sheen with some Dylusions mica spray although I'm not sure you can see that in the pictures.
For the mosaic portion of the technique, I was excited to crack open the new Distress paper mosaic kit and give it a try. It was fun to play with and there's so much in the kit, that I can make a lot of projects with the supplies.
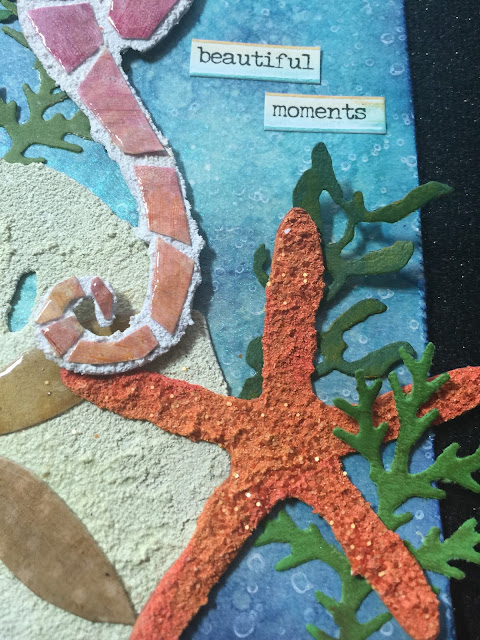
The seahorse is done is the typical mosaic fashion to look like a tiled piece, but I had fun playing with the grout texture on the sand dollar and starfish too.
I created the paper I used for the seahorse using the new Distress collage medium, crazing version. When dry I colored and smudged over that with some Distress crayons to add some color in the crazing. I love the porcelin look this gives. If you click the picture below, you might be able to see the detail close up.
For the starfish, I added the grout to the shape and let it dry. I painted it with a combination of Distress paints in barn door and wild honey and while the paint was still wet, sprinkled it lightly with some spiced marmalade Distress glitter. I really dug into the Distress stash for this project!
The sand dollar was sort of a combination between grout and 'tile' work. I gave the grout a coat of antique linen Distress paint as the white seemed too stark.
Last but not least, I added some vegetation from the festive greenery Sizzix Alternations die, added a little smear of crayon to the chit chat stickers and stuck an opal gem to an Ideaology charmed thingie which I threaded onto the very organic looking trim I used for a ribbon - it reminds me of sparkly seaweed!
All in all, I'm pretty happy with the results. I always think of things to edit after the fact, but I'm trying to take Tim's advice to embrace imperfection, so I'm going to call this one done!
After using the mosaic kit, the wheels in my head are turning and I look forward to using this technique on some 3D paper projects - the best of both worlds!
I'd love to hear what you think. Thanks for stopping by!
Subscribe to:
Comments (Atom)


